
People migrate their WordPress websites to new hosting providers for various reasons, including better performance, security, scale up their business, customer support, and features. Moving to a new web hosting that better fits their needs can significantly enhance a website’s functionality, user experience, and security.
Another important reason is cost saving. Some web hosting providers promote their host at a very reasonable price in the first 3 years, but extremely expensive when you renew your subscription. Therefore, migrating your WordPress website to another web hosting provider with a good price is a good option.
There are many WordPress plugins that can migrate your WordPress website, and All-in-One WP Migration is one of the best and easiest tools to do that. In this article, we will introduce how to migrate a WordPress website to new web hosting providers with All-in-One WP Migration Version 6.77.
Step 1: Install the All-in-One WP Migration 6.77 Plugin on Your Existing Site
- Log in to your WordPress Dashboard of the site you want to move.
- Go to Plugins > Add New.
- In the search bar, type “All-in-One WP Migration.”
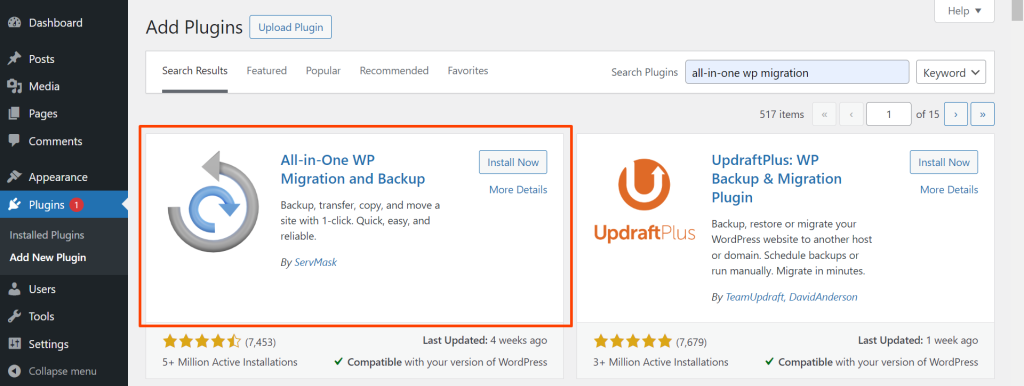
- Install and activate the plugin by ServMask.
Step 2: Export Your Website
- Once the plugin is activated, go to the new All-in-One WP Migration menu in the WordPress dashboard.
- Click Export.
- Select the export option Export to File.
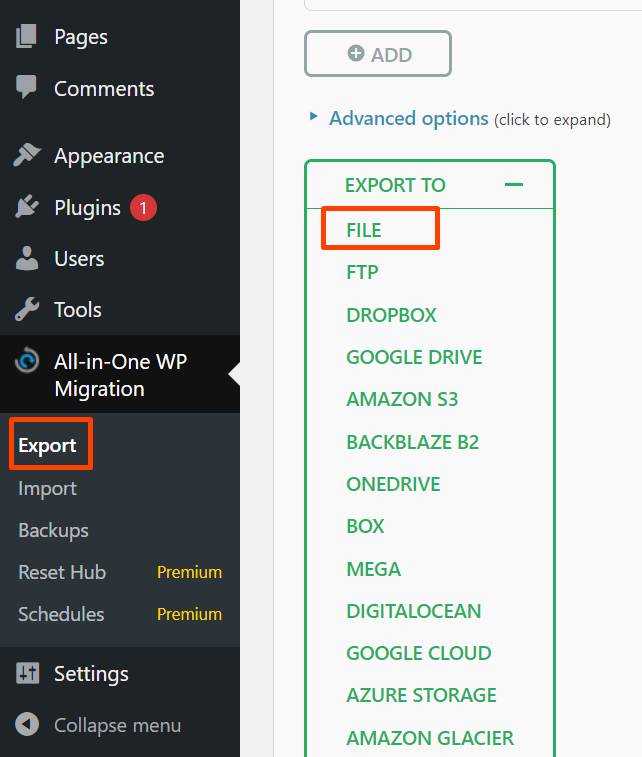
- The plugin will now start creating a backup file of your entire WordPress site, including the database, media files, themes, and plugins.
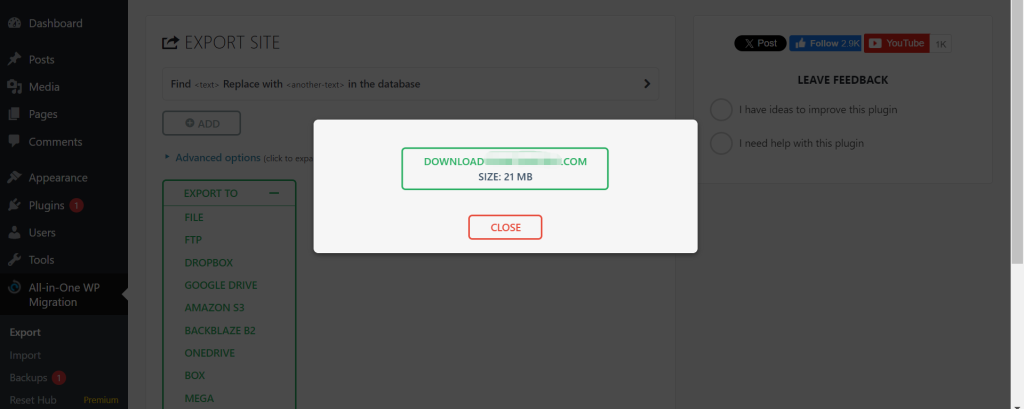
- After the process is complete, click the Download button to download the file (with a
.wpressextension) to your computer.
Step 3: Install WordPress on Your New Hosting
Before you can import your site to the new hosting provider, you need to set up WordPress:
- Log in to the control panel of your new hosting provider (e.g., cPanel, Plesk).
- Use the 1-click WordPress installer (or manually install WordPress) on the new host.
- Complete the installation by filling in the necessary details (site name, username, password). All these details will be replaced by the old WordPress website that you migrate to the new web hosting.
Step 4: Install All-in-One WP Migration Plugin on Your New Hosting Site
- Log in to the WordPress Dashboard of the newly installed WordPress site on your new hosting.
- Go to Plugins > Add New.
- Search for “All-in-One WP Migration” and install and activate the plugin again.
Step 5: Import Your Website to the New Hosting
- Once the plugin is installed and activated, go to All-in-One WP Migration > Import.
- Click Import From and choose the File option.
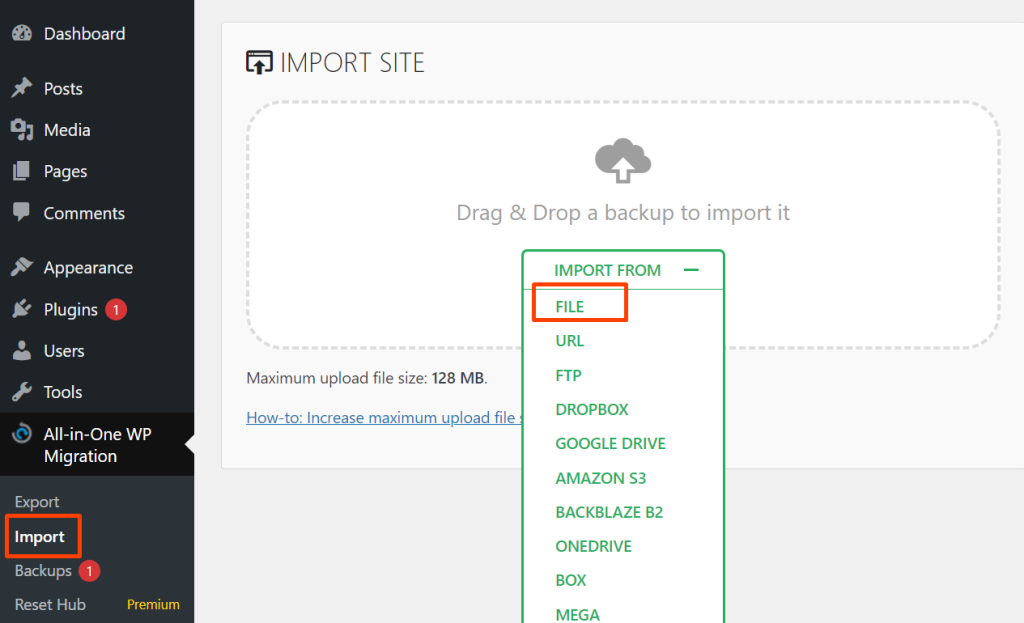
- Upload the
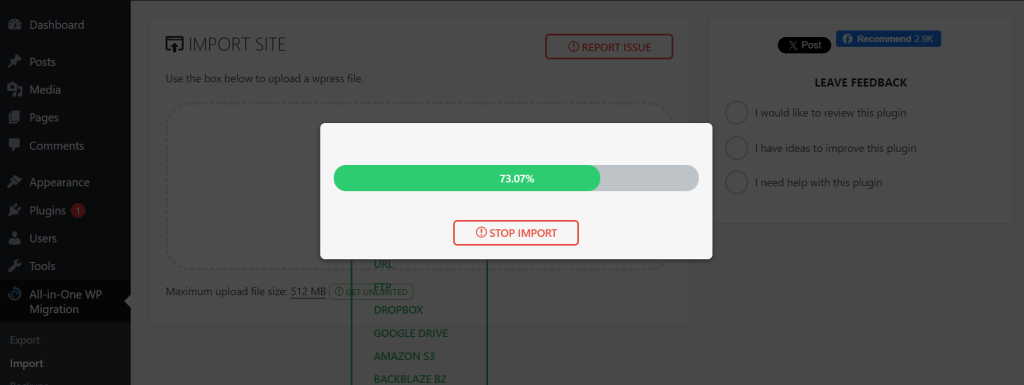
.wpressfile you downloaded in Step 2. - Wait for the file to upload and extract. This may take some time depending on the size of your website and your internet connection. The latest version of All-in-One Wp Migration has limited the maximum size of the file to 128MB, if your website is more than 128MB, you need to order their premium service. However, you can check this article to get unlimited file uploads.
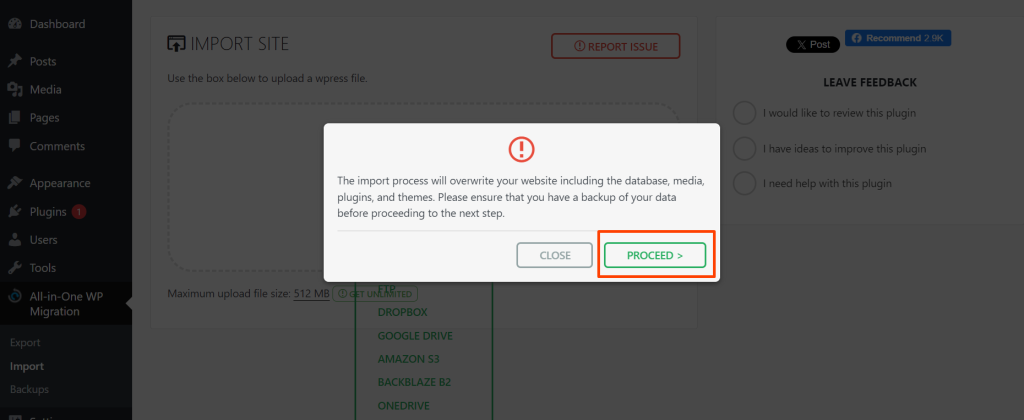
- Once the upload is complete, you’ll see a message asking for confirmation that the import will overwrite the existing database, media, and settings. Click Proceed to continue.
Step 6: Save Permalink Settings
After the import process is done, you’ll need to reset your permalinks to ensure all links work correctly:
- Go to Settings > Permalinks.
- Without making any changes, scroll down and click Save Changes.
Note: after you click the PROCEED button, you will logout from the new WordPress website. You need to login with the original username and password of the old WordPress website.
Step 7: Test Your Website
- Check all the pages on your site to ensure they are working correctly.
- Test forms, links, media, and other functionalities to make sure nothing is broken.
- Verify that all images and content have transferred properly.
Step 8: Update DNS and Point Domain to the New Host
If you’re also moving your domain to a new host, you’ll need to update the DNS (Domain Name System) settings.
- Log in to your domain registrar (where you bought the domain name).
- Find the DNS settings or Nameservers.
- Update the nameservers to the ones provided by your new hosting provider.
- It can take up to 48 hours for the DNS changes to propagate globally.
Conclusion
The All-in-One WP Migration plugin simplifies the migration process and is highly effective, even for beginners. With this method, you can move your WordPress site to a new hosting provider without needing to manually deal with databases, FTP, or complicated server configurations.