How to create shipped and in-transit order status slug in WooCommerce Order detail page

When customers place an order in your WooCommerce store, it’s very important to let customers know the status of their orders. Has the order been processed or shipped? Knowing the status of their orders can provide confidence to the customer in this online shopping experience. Therefore, the WooCommerce store must inform the customer of the right order statuses.

However, there are only 8 order statuses on the WooCommerce order detail page by default, not including shipped and in-transit status.

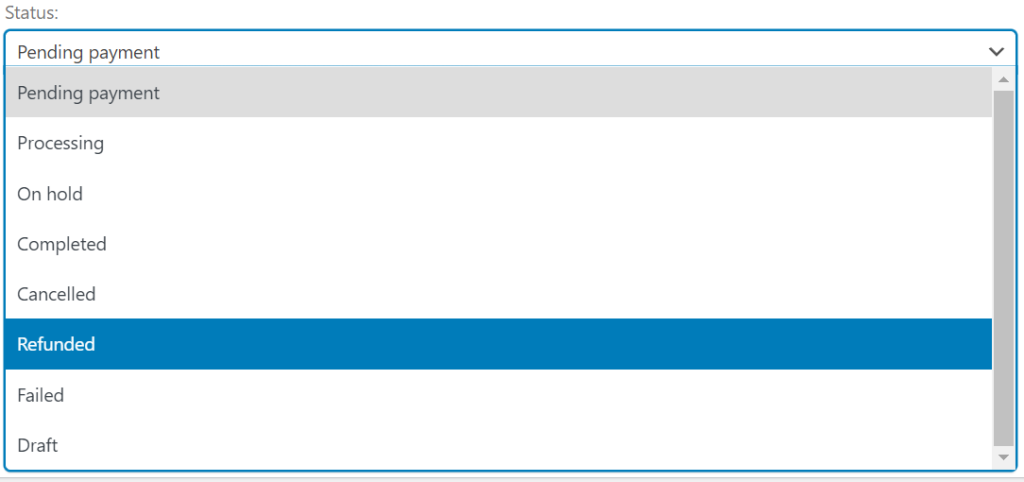
The default order statuses of WooCommerce order details are ‘Pending payment’ ‘Processing’ ‘On hold’ ‘Completed’ ‘Cancelled’ ‘Refunded’ ‘Failed’ and ‘Draft’.

When you ship the orders, there is no notification to inform your customers that the orders have been shipped. That makes your customers confused and may cause after-sale complaints. Adding customized order status to your order details can improve the customer shopping experience and help you grow your online business.

In this article, we will introduce how to create customized order status slugs in your WooCommerce store.

What is the order status in the WooCommerce store?

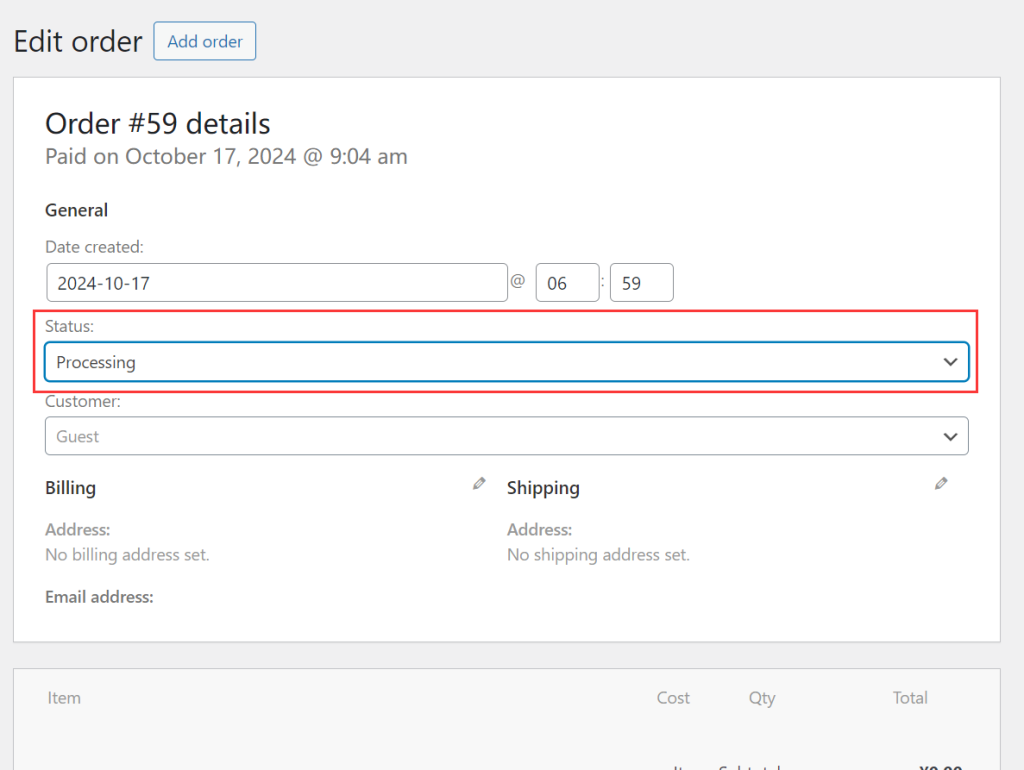
The order status is the slugs in the WooCommerce store that indicate at which steps the order has been handled. When the shop owner changes the order status, the system will inform the customer that the order has been processed.

How to create customized order status slugs in the WooCommerce store?

There are several methods that can help you create customized order status slugs in the WooCommerce store, including using plugins and adding code snippets to the functions.php. We do not recommend adding code snippets to the functions.php, because it may cause risk to the system. A plugin is safer and won’t have any effect to your website in case WordPress updates.

In this article, we introduce how to create ‘Shipped’ and ‘In Transit’ order statuses by creating a plugin.

We’ll create a custom plugin that registers these new statuses and integrates them into the order management workflow.

Purpose:

  1. Create the plugin to add custom statuses.
  2. Register new order statuses like “Shipped” and “In Transit.”
  3. Add the statuses to WooCommerce admin filters so that they appear in the WooCommerce order status dropdown and reports.

Step 1: Set Up the Plugin

The first step is to create the basic structure of the plugin.

  • Create the Plugin Folder
    Create a new folder called custom-order-statuses. in your PC.
  • Create the Plugin File
    In the custom-order-statuses folder, create a PHP file named custom-order-statuses.php. This will contain the code for your plugin.

Step 2: Add the Plugin Header and Customizer Code

In the custom-order-statuses.php file, add the following code:

				
					<?php
/*
Plugin Name: Woo Custom Order Statuses
Description: Adds custom order statuses "Shipped" and "In Transit" to WooCommerce.
Version: 1.0
Author: WPCOLLEGE
Author URI: https://wpcollege.com
*/

// Register custom order statuses
function register_custom_order_statuses() {
    register_post_status('wc-shipped', array(
        'label'                     => _x('Shipped', 'Order status', 'woocommerce'),
        'public'                    => true,
        'exclude_from_search'       => false,
        'show_in_admin_all_list'    => true,
        'show_in_admin_status_list' => true,
        'label_count'               => _n_noop('Shipped <span class="count">(%s)</span>', 'Shipped <span class="count">(%s)</span>', 'woocommerce')
    ));

    register_post_status('wc-in-transit', array(
        'label'                     => _x('In Transit', 'Order status', 'woocommerce'),
        'public'                    => true,
        'exclude_from_search'       => false,
        'show_in_admin_all_list'    => true,
        'show_in_admin_status_list' => true,
        'label_count'               => _n_noop('In Transit <span class="count">(%s)</span>', 'In Transit <span class="count">(%s)</span>', 'woocommerce')
    ));
}
add_action('init', 'register_custom_order_statuses');

// Add custom statuses to WooCommerce order status list
function add_custom_order_statuses_to_list( $order_statuses ) {
    $new_statuses = array(
        'wc-shipped'   => _x('Shipped', 'Order status', 'woocommerce'),
        'wc-in-transit'=> _x('In Transit', 'Order status', 'woocommerce'),
    );

    // Insert custom statuses after 'wc-completed'
    $order_statuses = array_slice($order_statuses, 0, 5, true) + $new_statuses + array_slice($order_statuses, 5, null, true);

    return $order_statuses;
}
add_filter('wc_order_statuses', 'add_custom_order_statuses_to_list');

// Add custom statuses to admin order view
function display_custom_order_statuses_bulk_edit( $bulk_actions ) {
    $bulk_actions['mark_shipped'] = __('Change status to shipped', 'woocommerce');
    $bulk_actions['mark_in-transit'] = __('Change status to in transit', 'woocommerce');
    return $bulk_actions;
}
add_filter('bulk_actions-edit-shop_order', 'display_custom_order_statuses_bulk_edit');

// Add the custom statuses to order bulk actions
function handle_custom_order_status_bulk_edit( $redirect_to, $doaction, $post_ids ) {
    if ( $doaction === 'mark_shipped' ) {
        foreach ( $post_ids as $post_id ) {
            $order = wc_get_order( $post_id );
            $order->update_status('shipped');
        }
    }

    if ( $doaction === 'mark_in-transit' ) {
        foreach ( $post_ids as $post_id ) {
            $order = wc_get_order( $post_id );
            $order->update_status('in-transit');
        }
    }

    return $redirect_to;
}
add_filter('handle_bulk_actions-edit-shop_order', 'handle_custom_order_status_bulk_edit', 10, 3);

// Add custom statuses to reports
function add_custom_order_statuses_to_reports( $statuses ) {
    $statuses[] = 'wc-shipped';
    $statuses[] = 'wc-in-transit';
    return $statuses;
}
add_filter('woocommerce_reports_order_statuses', 'add_custom_order_statuses_to_reports');

// Add custom statuses to admin reports
function add_custom_order_statuses_to_order_report( $args ) {
    $custom_statuses = array('wc-shipped', 'wc-in-transit');
    $args['post_status'] = array_merge($args['post_status'], $custom_statuses);
    return $args;
}
add_filter('woocommerce_admin_order_report_query', 'add_custom_order_statuses_to_order_report');

// Add custom statuses to email notifications
function add_custom_order_statuses_email( $email_actions ) {
    $email_actions[] = 'woocommerce_order_status_shipped';
    $email_actions[] = 'woocommerce_order_status_in_transit';
    return $email_actions;
}
add_filter('woocommerce_email_actions', 'add_custom_order_statuses_email');


Step 2: Activate the Plugin

  1. Zip the custom-order-statuses folder.
  2. Go to your WordPress dashboard.
  3. Navigate to Plugins → Add New → Upload Plugin and upload the ZIP file.
  4. Once uploaded, activate the plugin.

Step 3. Test the plugin

Once activate the plugin, you can see that the newly create order statuses have been added to the order detail drop-down menu.


Summary

Creating new custom order statuses in WooCommerce can significantly enhance the efficiency of online store management. This feature allows for a more online shopping experience for customers and helps businesses address their specific needs more effectively.

With the plugin, you don’t need to add code snippets to the functions.php. That make your core code in the WordPress website safer and have no effect even WordPress or WooCommerce update to the latest version.

Scroll to Top