To elevate the visual appeal of your website, you can add custom fonts to your web design. If you use Elementor as your website builder, you can easily achieve that.
In this article, we will introduce how to add custom fonts to WordPress via Elementor.
Why Use Custom Fonts?
Custom fonts can:
Strengthen your brand identity.
Improve readability and user experience.
Help your website stand out from competitors.
Elementor makes it easy to upload and use custom fonts without requiring extensive coding knowledge.
Steps to add Custom Fonts Directly in Elementor
If you’re using Elementor Pro, you can upload custom fonts directly within the Elementor interface. Here’s how:
Step 1: Prepare Your Font Files
Before uploading, ensure you have the necessary font file formats. The most commonly used formats are:
.woff and .woff2: Web-friendly formats with excellent browser support.
.ttf (TrueType Font) and .otf (OpenType Font): Older formats but still widely supported.
Recommended Free Fonts https://fonts.google.com/
Here are some great free fonts to consider for your website:
1. Google Fonts (Default in Elementor)
Roboto: Clean and modern, suitable for a variety of websites.
Open Sans: Highly readable and versatile.
Lora: Elegant and perfect for blogs or creative websites.
Poppins: Bold and geometric, great for headlines.
Google Fonts

2. Other Free Font Resources
Font Squirrel: Offers a collection of free, high-quality fonts for commercial use.
DaFont: A popular platform for free fonts with creative designs.
Adobe Fonts (Free with Creative Cloud): Provides a curated selection of web-friendly fonts.
Step 2: Upload the Font in Elementor
Go to the Elementor Settings:
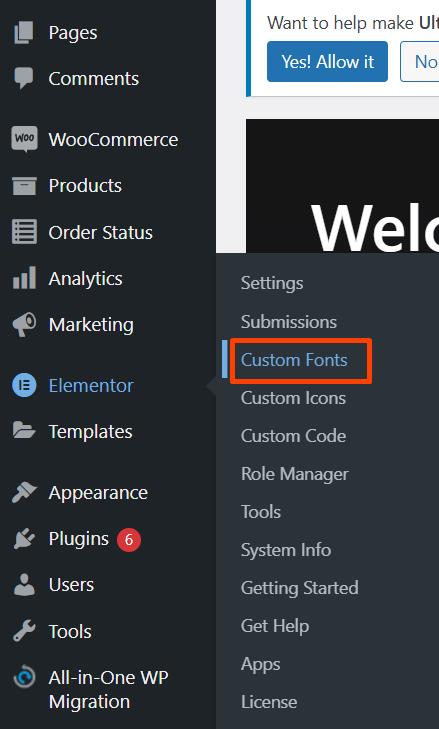
In your WordPress dashboard, navigate to Elementor > Custom Fonts.
Add a New Font:
Click the Add New button.
Give your font a name (for example “epilogue roboto”).
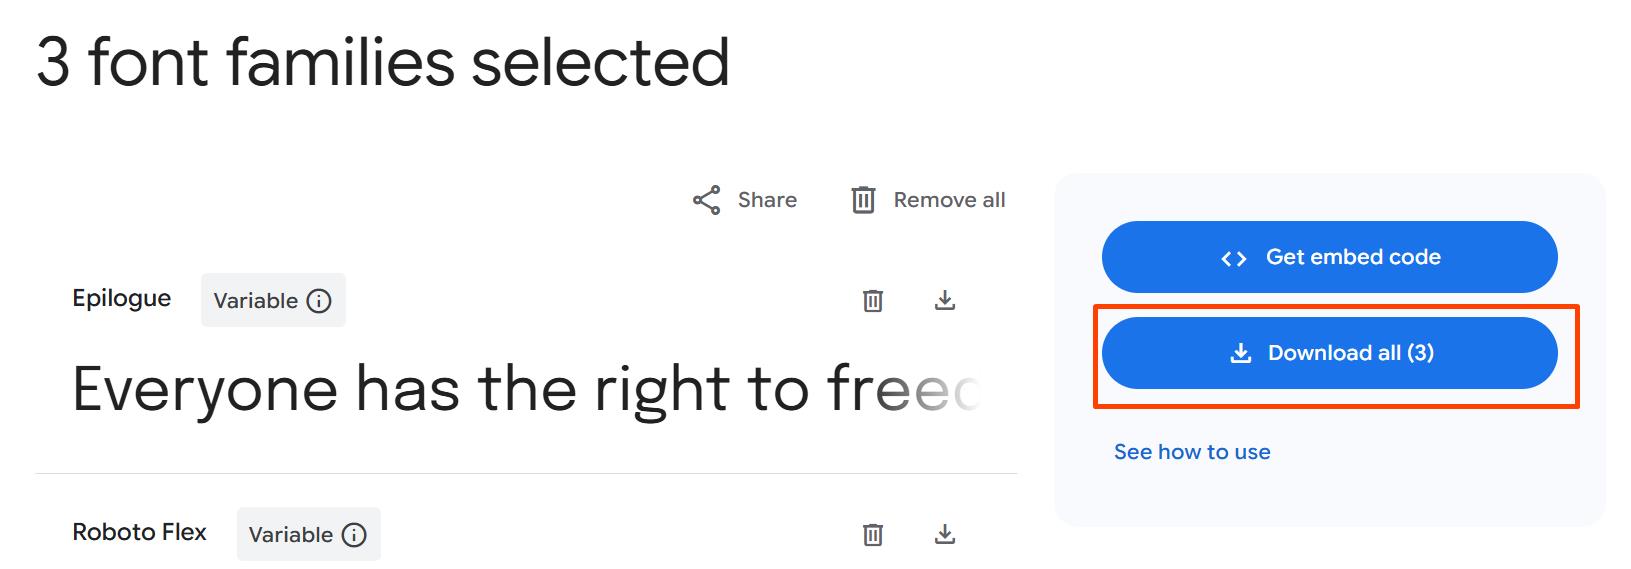
You can download free fonts from Google Fonts. https://fonts.google.com/
Upload Font Files:
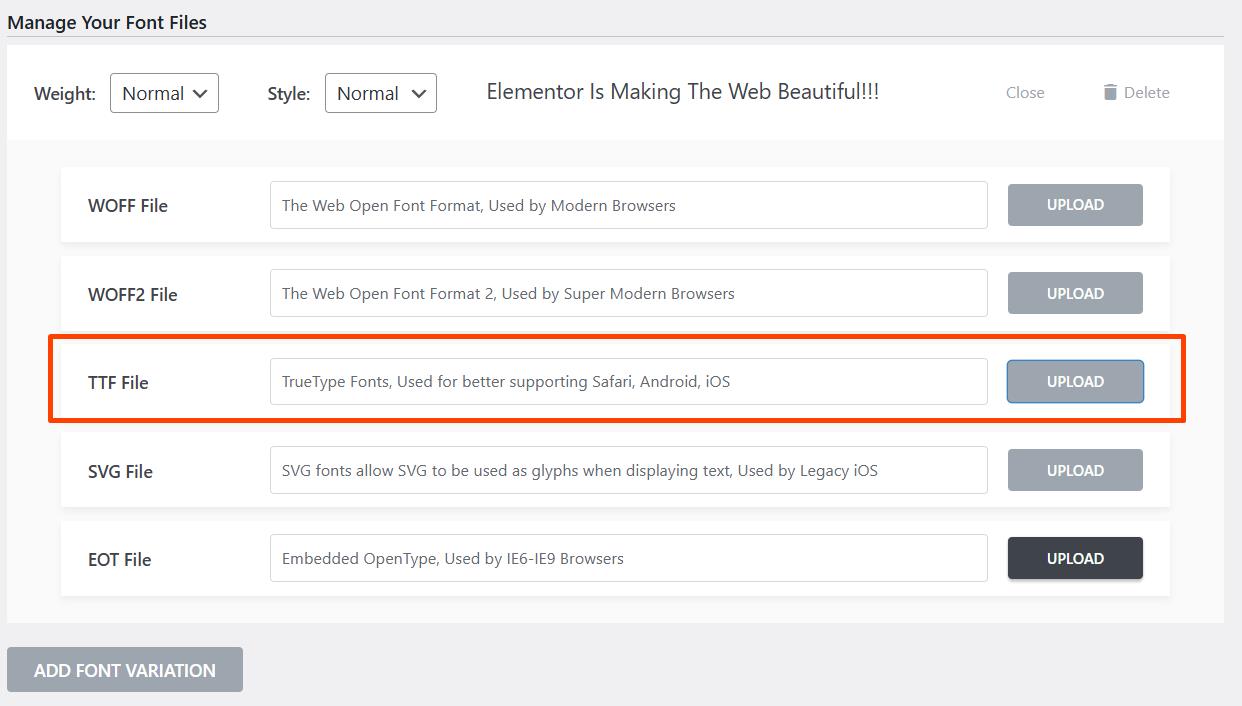
Click Add Font Variations and upload the required font files for different weights and styles (e.g., Regular, Bold, Italic).
Assign weights (e.g., 400 for Regular, 700 for Bold) and styles (e.g., Normal, Italic) for each uploaded file.
Publish the Font:
Once all variations are uploaded, click Publish to make the font available in Elementor.

Step 3: Apply the Font to Your Website
Edit a Widget:
Open a page or template in Elementor.
Select a widget (e.g., Heading or Text Editor).
Choose the Custom Font:
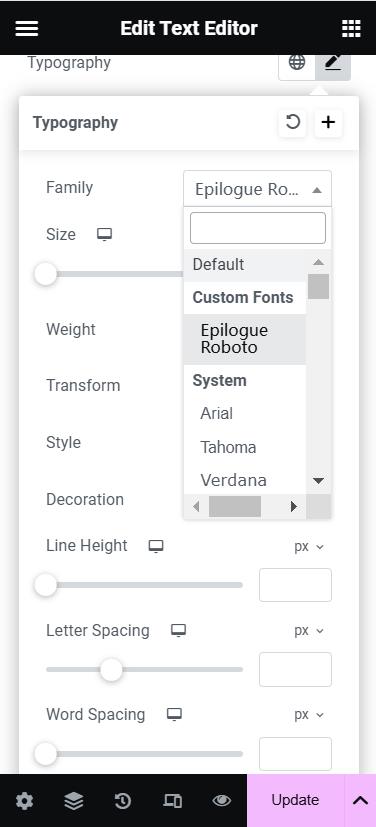
In the Style tab, go to Typography.
Under the Family dropdown, search for and select your custom font.
Customize Further:
Adjust the font size, weight, style, and line height to fit your design.
Conclusion
Adding custom fonts to WordPress with Elementor is a straightforward process that can significantly enhance your website’s design. Whether you upload your own fonts or use Google Fonts, Elementor provides the tools to customize typography effortlessly. For additional inspiration, explore free font libraries like Font Squirrel or DaFont to find the perfect style for your site.

