Creating a child theme for the current theme in your WordPress website is a great method to improve website security. As we know, WordPress is an open-source CMS platform, a child theme can prevent your customization from being overwritten when the parent theme is updated.
In this article, we will introduce how to create a child theme for your current theme in WordPress.
Step-by-step guide on creating a child theme
You can create the child theme in the folder of your WordPress site directory, or you can package the child theme folder as a .zip file and upload it through the WordPress dashboard. Here’s a step-by-step guide. Here we crete the child theme folder in the local PC, and zip and upload it.
Step 1: Create the Child Theme Folder
- In your local environment (your computer), create a folder for the child theme, e.g.,
storefront-child. - Inside this folder, add two files:
style.css– This is where you add the child theme’s header and any custom CSS.functions.php– This will contain any custom PHP code, such as the code to enqueue the parent theme’s stylesheet.
Step 2: Add Code to style.css and functions.php
In
style.css:
Add the following code to ensure WordPress recognizes it as a child theme. Replace"mytheme"with your parent theme’s folder name.
/*
Theme Name: storefront Child
Theme URI: http://wpcollege.com/mytheme-child
Description: storefront Child Theme
Author: Your Name
Author URI: http://wpcollege.com
Template: storefront
Version: 1.0
Text Domain: storefront-child
*/
/* Import the parent theme's stylesheet */
@import url("../storefront/style.css");
- In
functions.php:
Add this code to ensure the parent theme’s stylesheet is enqueued properly.
get('Version'));
}
add_action('wp_enqueue_scripts', 'mytheme_child_enqueue_styles');
Step 3: Create a cover image for the Child Theme
Normally, the current theme contains a cover image, you should also create a cover image for the Child theme,
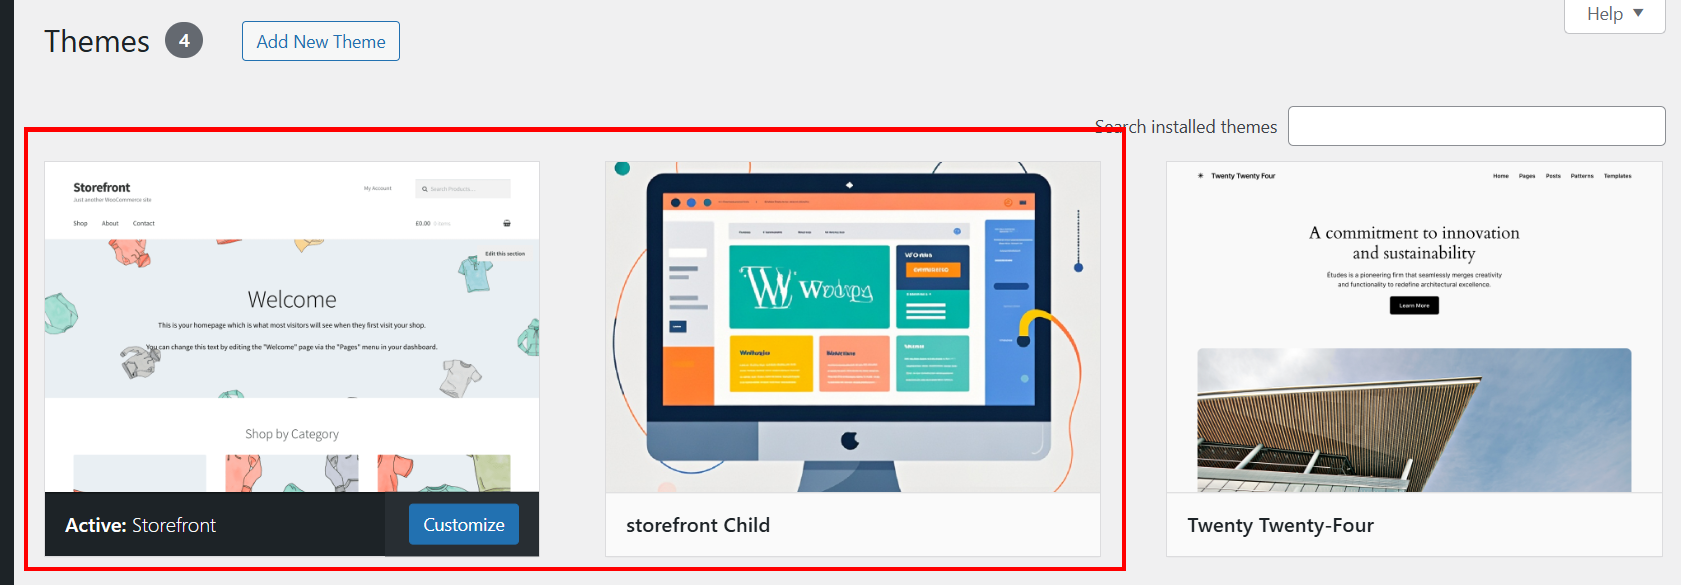
You can create an image file named screenshot.png and place it in the root of your child theme folder storefront-child.
- The recommended dimensions for the cover image are 1200 x 900 pixels. WordPress will resize it to fit smaller previews in the theme selection area.
- The file must be named
screenshot.png.
This image will appear as the preview for your theme in the WordPress dashboard.
Step 4: Zip the Child Theme Folder
- Go to the folder where
storefront-childis located. - Right-click on the
storefront-childfolder and select Compress or Send to > Compressed (zipped) folder. - This should create a
.zipfile, e.g.,storefront-child.zip.
Step 5: Upload the Child Theme in WordPress
- Go to your WordPress Dashboard.
- Navigate to Appearance > Themes.
- Click on Add New and then Upload Theme.
- Choose the
storefront-child.zipfile and click Install Now. - Once installed, click Activate.
