The original cart page and checkout page in the WooCommerce store may not be compatible with your website’s style. In this case, you need to customize them. You can customize them just with the Elementor page builder(only the pro version can do that). You can also use other plugins to customize them.
In this article, we will introduce how to customize the Cart page and Checkout page with a WordPress plugin named Shopengine. And it’s all free.
ShopEngine is an all-in-one WooCommerce builder for Elementor, allows you to visually customize WooCommerce pages, including the cart and checkout, without needing to write any code. Here’s a step-by-step guide on how to do it.
Step 1: Install and Activate ShopEngine Plugin
- Install ShopEngine:
- Go to your WordPress Dashboard.
- Navigate to Plugins > Add New.
- Search for ShopEngine, choose the All in One WooCommerce Solution.
- Install and activate the plugin.
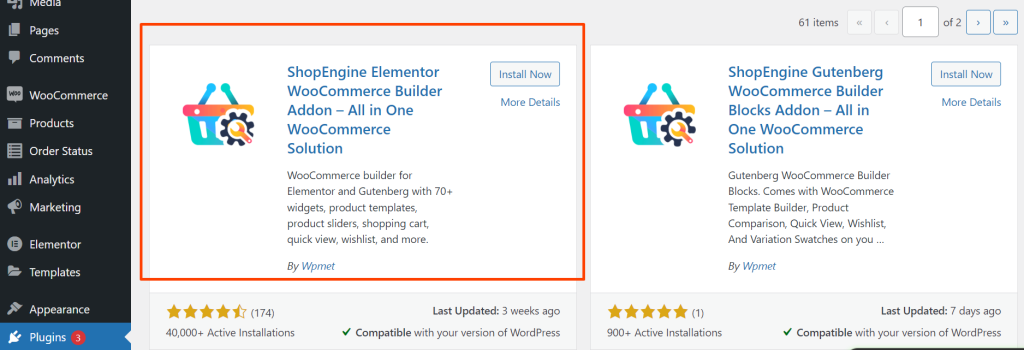
- Install and Activate Elementor(you don’t need the pro version, only the free version can do the job)
- If you don’t already have Elementor, install and activate it, as ShopEngine is built for Elementor-based customization.
Step 2: Activate Cart and Checkout Modules in ShopEngine
- Activate Cart and Checkout Modules:
- Navigate to ShopEngine > Modules from your WordPress Dashboard.
- Scroll down and enable both the Cart and Checkout modules.
- Save the changes.
Step 3: Customize the Cart Page
- Create a Cart Template:
- Go to ShopEngine > Builder Templates.
- Click the Add New button and select Cart Page from the dropdown.
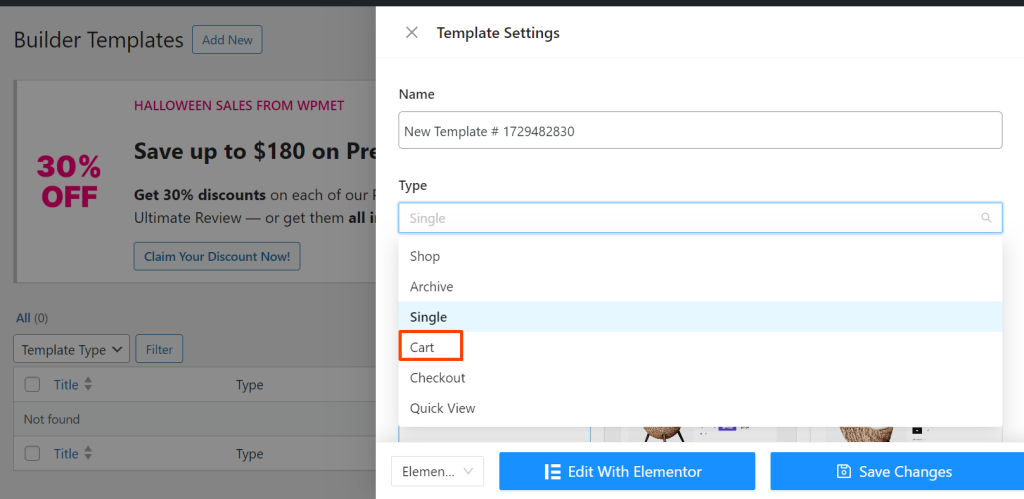
- Give your template a name like “Custom Cart Page.”
- Click Edit with Elementor.
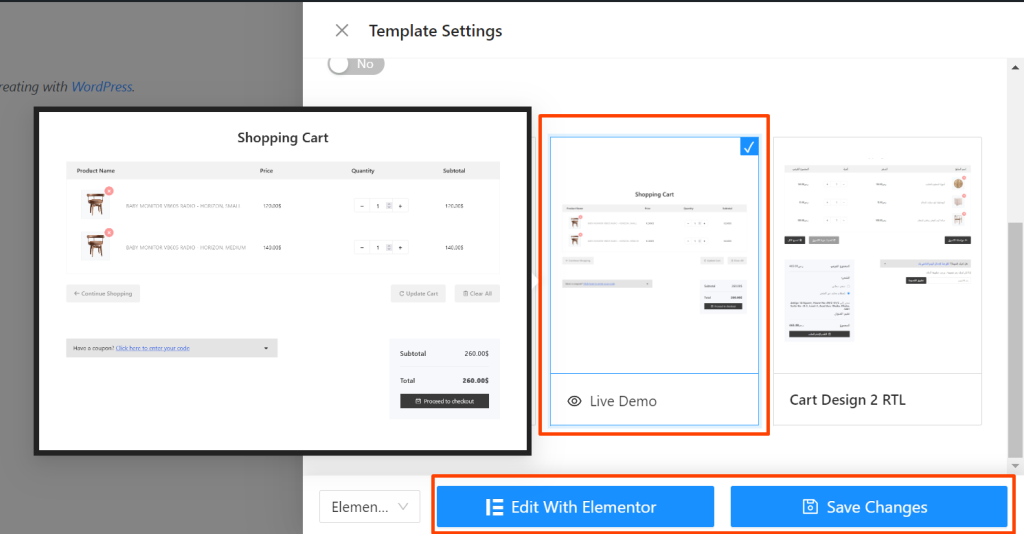
- Customize the Cart Page with Elementor:
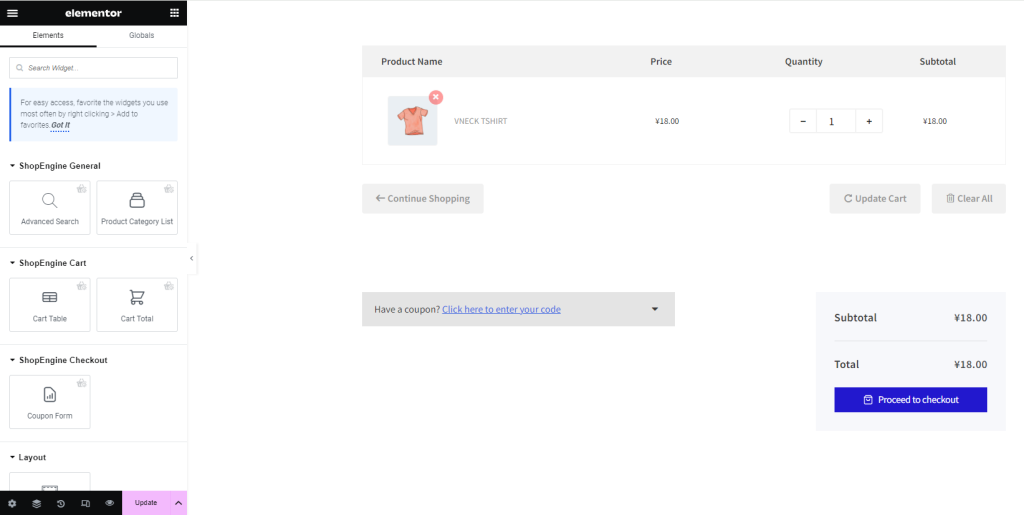
- Once in the Elementor editor, you will see various widgets you can drag and drop to build your cart page.
- ShopEngine provides several cart-specific widgets such as:
- Cart Table: Displays the products in the cart.
- Cart Totals: Shows the total cost including taxes and shipping.
- Coupon Form: Allows users to apply coupon codes.
- Proceed to Checkout Button: A button to lead customers to the checkout page.
- Design the Cart Page:
- Customize each widget to match your store’s design and functionality needs.
- You can adjust styles, layouts, button text, and more using Elementor’s design options.
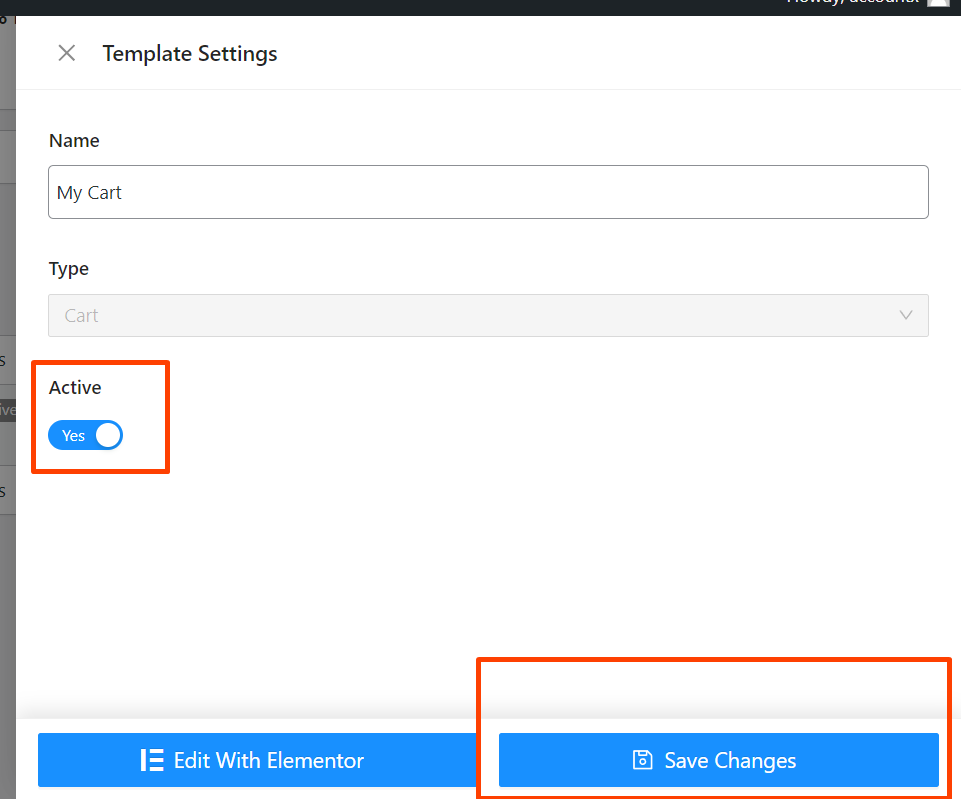
- Update and active the Cart Template:
- Once you are satisfied with the design, click Update to save the template.
- Go to ShopEngine builder templates, and active the cart page template you just created. ShopEngine will automatically assign this template to the WooCommerce cart page.

Step 4: Customize the Checkout Page
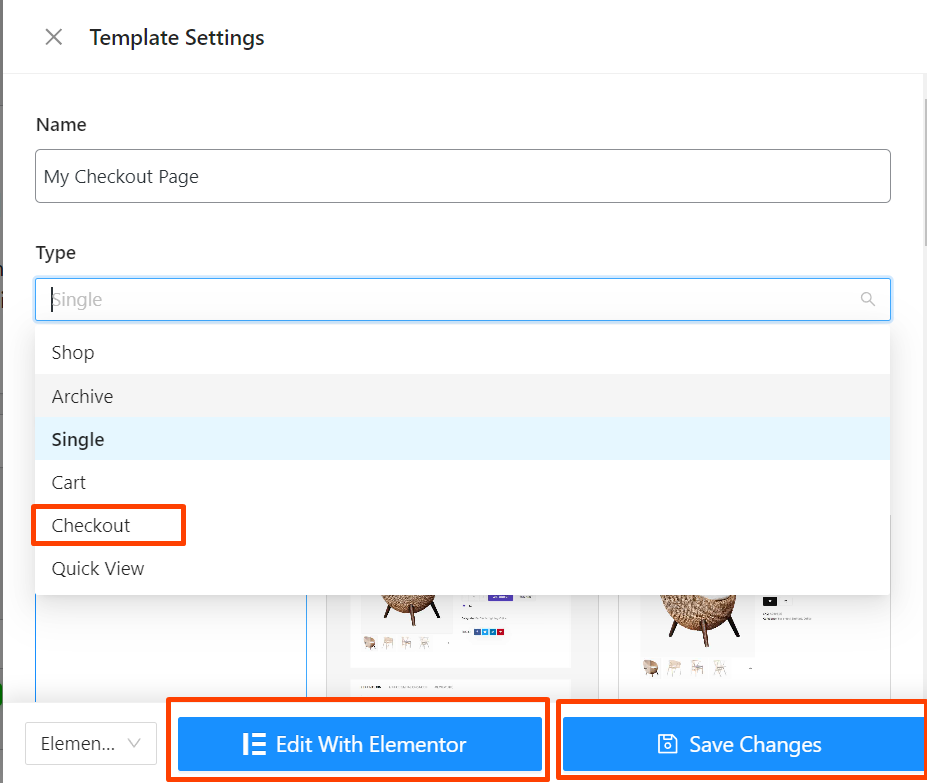
- Create a Checkout Template:
- Similar to the cart page, go to ShopEngine > Builder Templates.
- Click Add New and select Checkout Page from the dropdown.
- Give your template a name like “Custom Checkout Page.”
- Click Edit with Elementor.
- Customize the Checkout Page with Elementor:
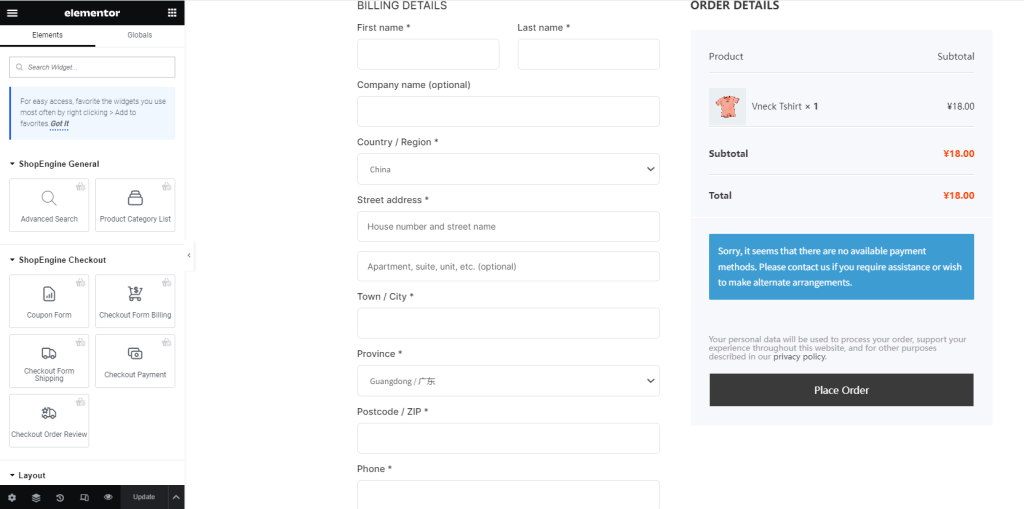
- You will have access to checkout-specific widgets such as:
- Billing Form: Allows customers to enter their billing details.
- Shipping Form: Allows customers to enter their shipping details.
- Order Review: Displays the products being ordered and their prices.
- Payment Method: Allows customers to choose their payment method.
- Place Order Button: Button for confirming and placing the order.
- You will have access to checkout-specific widgets such as:
- Design the Checkout Page:
- You can design the layout and appearance of each section using Elementor’s drag-and-drop editor.
- Modify form fields, section labels, button styles, and more to fit your brand’s design.
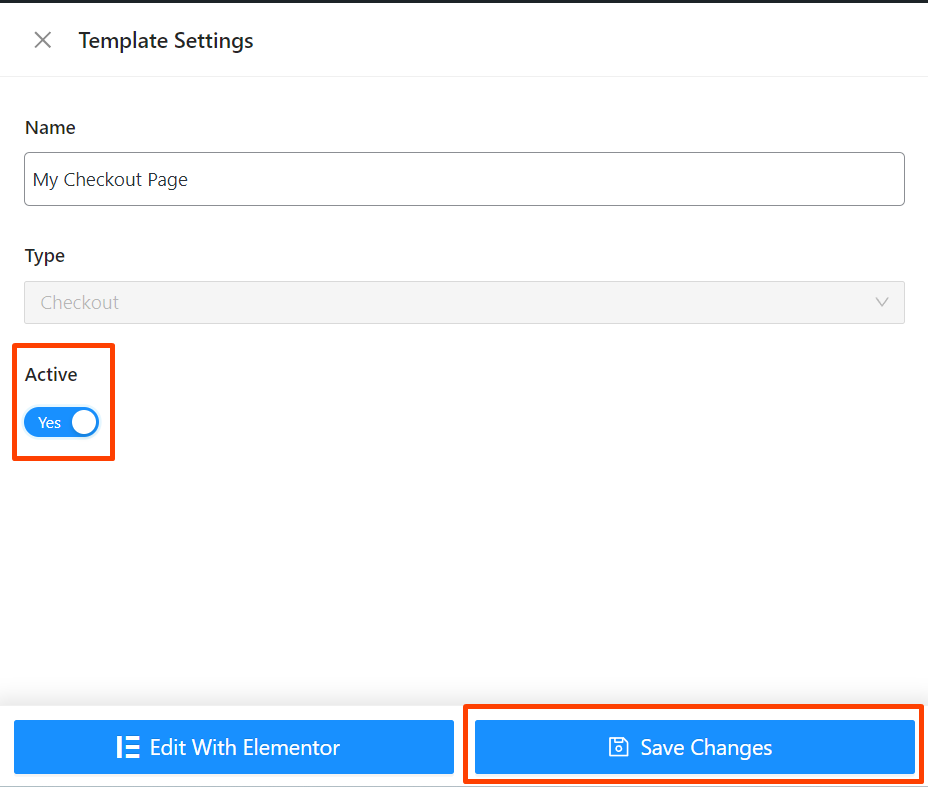
- Active the Checkout Template:
- Once done, click Update to save your changes.
- Go to ShopEngine builder templates, and active the check page template you just created. ShopEngine will automatically assign this template to the WooCommerce cart page.

Conclusion
By following these steps, you can easily customize the WooCommerce cart and checkout pages using the ShopEngine plugin and Elementor. This method gives you the flexibility to create a unique shopping experience that aligns with your brand while improving user engagement and conversion rates. All these plugins are for free, you can customize your cart page and check-out page without any coding knowledge too.

