When you have an eCommerce store, you wish your customer can easily log in to their account to check the orders they have made. Generally, the WooCommerce store does not have a specific login link that users can easily find. Users need to go to the My Account page for the login section. Therefore, some customers can’t find the login page after they purchase on the online WooCommerce store. Displaying the login button and logged-in user information on the top navigation menu can increase the user-friendly experience for customers and boost your sales.
In this article, we will introduce how to display the login button and logged-in user information on the navigation menu of your WooCommerce website. The feature we want is to hide the login button when the user has already logged in, hide the logged information, and show the login button after the user logs out. See the demo pictures below.


When customers log in, they will see the dynamic user name and avatar on the right side of the menu, when they log out, the user name and avatar disappear and show the login button.
How to add user info and avatar to the right corner of the top menu in the WooCommerce online store?
Although some plugins can do the same job, you need to install several plugins that can make your site slow down. Here we need to create a shortcode plugin and Elementor page builder pro to finish the job.
Step 1.
Create a shortcode plugin that packs all the features you want into it. and generate a shortcode named [user_info].
1. Create a New Folder for your plugin. Name it as display-user-info-shortcode.
2. Create the Main Plugin File. Inside the folder, create a PHP file called display-user-info-shortcode.php.
3. Copy and past the snippet below to the file display-user-info-shortcode.php.
					<?php
/*
Plugin Name: Display User Info with Avatar On Menu
Description: A simple plugin to display the logged-in user's greeting, username, avatar, and a dropdown menu with "My Account" and "Logout" links. Includes custom CSS for the login button, dropdown menu, and username styling.
Version: 1.5
Author: WPCOLLEGE
Author URI: https://wpcollege.com
*/

// Enqueue the CSS and JS for the login button, username, and dropdown menu with delay
function user_info_custom_css_js() {
    echo '
    <style>
    /* Style for the login button */
    .login-button {
        display: inline-flex;
        align-items: center;
        background-color: #3e64de; /* Button background color */
        color: #fff; /* Text color */
        padding: 5px 15px;
        border-radius: 30px;
        text-decoration: none;
        font-weight: bold;
        font-size: 16px;
    }

    .login-button i {
        margin-right: 8px; /* Space between the icon and the text */
        font-size: 16px;
    }

    .login-button:hover {
        background-color: #005780; /* Hover background color */
        color:#fff;
    }

    /* Style for the logged-in username */
    .user-info {
        position: relative;
        display: inline-block;
    }

    .user-name {
        font-family: "Roboto", sans-serif;
        font-size: 16px;
        color: #0d0d0d;
        font-weight: 400;
        text-decoration: none;
        cursor: pointer;
    }

    .user-name:hover {
        color: #005780; /* Optional hover color */
    }

    /* Dropdown menu */
    .dropdown-menu {
        display: none;
        position: absolute;
        background-color: #fff; /* Background color */
        min-width: 160px;
        box-shadow: 0px 8px 16px rgba(0,0,0,0.2);
        z-index: 1;
        padding: 10px 0;
        margin-top: 5px;
        transition: opacity 0.3s ease;
        opacity: 0;
    }

    .user-info.hovered .dropdown-menu {
        display: block;
        opacity: 1;
    }

    .dropdown-menu a {
        color: #000; /* Text color */
        padding: 12px 16px;
        text-decoration: none;
        display: block;
    }

    .dropdown-menu a:hover {
        background-color: #000; /* Hover background color */
        color: #fff; /* Hover text color */
    }
    </style>

    <script>
    document.addEventListener("DOMContentLoaded", function() {
        const userInfo = document.querySelector(".user-info");
        const dropdownMenu = document.querySelector(".dropdown-menu");

        let timeout;

        if (userInfo && dropdownMenu) {
            userInfo.addEventListener("mouseenter", function() {
                clearTimeout(timeout); // Clear the hide delay if user re-enters
                userInfo.classList.add("hovered");
            });

            userInfo.addEventListener("mouseleave", function() {
                timeout = setTimeout(function() {
                    userInfo.classList.remove("hovered");
                }, 1000); // 1-second delay before hiding the dropdown
            });
        }
    });
    </script>
    ';
}
add_action('wp_head', 'user_info_custom_css_js');

// Create a shortcode to display the logged-in user's greeting, username, avatar, and dropdown menu
function display_user_info_with_avatar() {
    if (is_user_logged_in()) {
        // Get current user info if logged in
        $current_user = wp_get_current_user();
        $avatar = get_avatar($current_user->ID, 32); // Get the user's avatar (32px size)
        $logout_url = wp_logout_url(home_url()); // Logout URL with redirect to homepage
        $my_account_url = wc_get_account_endpoint_url('dashboard'); // WooCommerce My Account URL

        // Return "Hello" greeting, username (with link), avatar, and dropdown menu
        return '
        <div class="user-info">
            Hello, <span class="user-name">' . esc_html($current_user->display_name) . '</span> ' . $avatar . '
            <div class="dropdown-menu">
                <a href="' . esc_url($my_account_url) . '">My Account</a>
                <a href="' . esc_url($logout_url) . '">Logout</a>
            </div>
        </div>';
    } else {
        // If not logged in, display login button
        $login_url = wp_login_url(); // Default WordPress login URL
        return '<a href="' . esc_url($login_url) . '" class="login-button"><i class="fas fa-sign-in-alt"></i> Login</a>';
    }
}
add_shortcode('user_info', 'display_user_info_with_avatar');

// Redirect to My Account page after login
function custom_login_redirect( $redirect_to, $request, $user ) {
    // Check if the user has a role (logged in)
    if (isset($user->roles) && is_array($user->roles)) {
        // Redirect to WooCommerce My Account page if the user logs in
        $redirect_to = wc_get_account_endpoint_url('dashboard');
    }
    return $redirect_to;
}
add_filter('login_redirect', 'custom_login_redirect', 10, 3);
4. Compress the Folder, Zip the display-user-info-shortcode folder that contains the display-user-info-shortcode.php file.
5. Upload the Plugin, Go to your WordPress Dashboard → Plugins → Add New → Upload Plugin. Upload the zipped folder, install, and activate it.
6. Now you have a shortcoe [user_info], which can enable the dynamic user name and avatar on your top menu.
Step 2.
We assume that you have already created a header template using Elementor Pro. To enable the user name and avatar to display on the top menu, you need to add the shortcode to the menu by editing the header template.

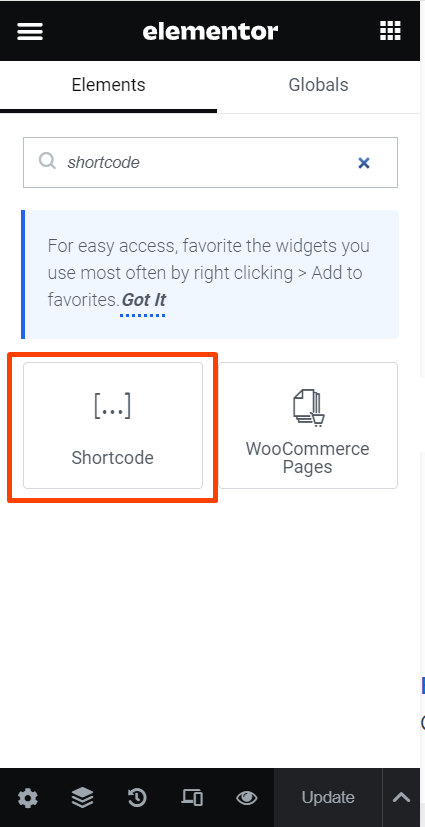
Search the shortcode Widget and drag it to the Menu bar container. input the shortcode [user_info] to edit the shortcode field, and update it.

Below is what you will get after adding the shortcode to the navigation menu bar.

By doing that you have successfully added the user info and login button to your top navigation menu. You can also add the [user_info] shortcode to display the user name and avatar wherever you want. You can also customize the typography and background color of the dropdown menu by editing the plugin codes.

