Creating a WordPress website is literally easier now than you thought. If you are a beginner, you don’t need to spend time learning to code before you can make your own WordPress website. Creating a WordPress site is a relatively straightforward process. Below are the steps you can follow to launch your website and start your business based on the WordPress Site.
1. Register a domain for your business.
Registering a domain name is easy. Just like purchasing goods from all e-commerce websites. The first step you need to do is register an account on the website of the domain registrar company. After that, you need to choose the right domain name, add it to the cart, and finish the payment. It is that simple for you to have a domain name. And your domain is the first step of your dream. To read more about the domain, please read this article on the domain.
We recommend these domain registrars, you can choose any of them to register your domain. These are the options for you, you can also register your domain on other registrars.
| Dynadot | https://dynadot.com |
| NameSilo | https://namesilo.com |
| Godaddy | https://godaddy.com |
| NameCheap | https://namecheap.com |
The average cost of each .com TLD is about US$10.99 to US$15.99. Compared with the business cost, the price is rather inexpensive.
2. Choose an appropriate web hosting for your website.
After the domain registration, you need to purchase web hosting for your website. To know more about web hosting, please read this article on web hosting
If you are a beginner on WordPress and have little knowledge of coding, we suggest you use shared hosting rather than VPS hosting. Because it will take you more time and energy to configure VPS hosting than shared hosting. With the help of shared hosting, you can install your WordPress site with 1-click installation.
In this article, we assume that you choose the shared hosting from Siteground as your web hosting and show you the steps to install a WordPress site on Siteground.
Steps To Purchase A Shared Hosting on siteground
Visit Siteground on their official homepage https://siteground.com
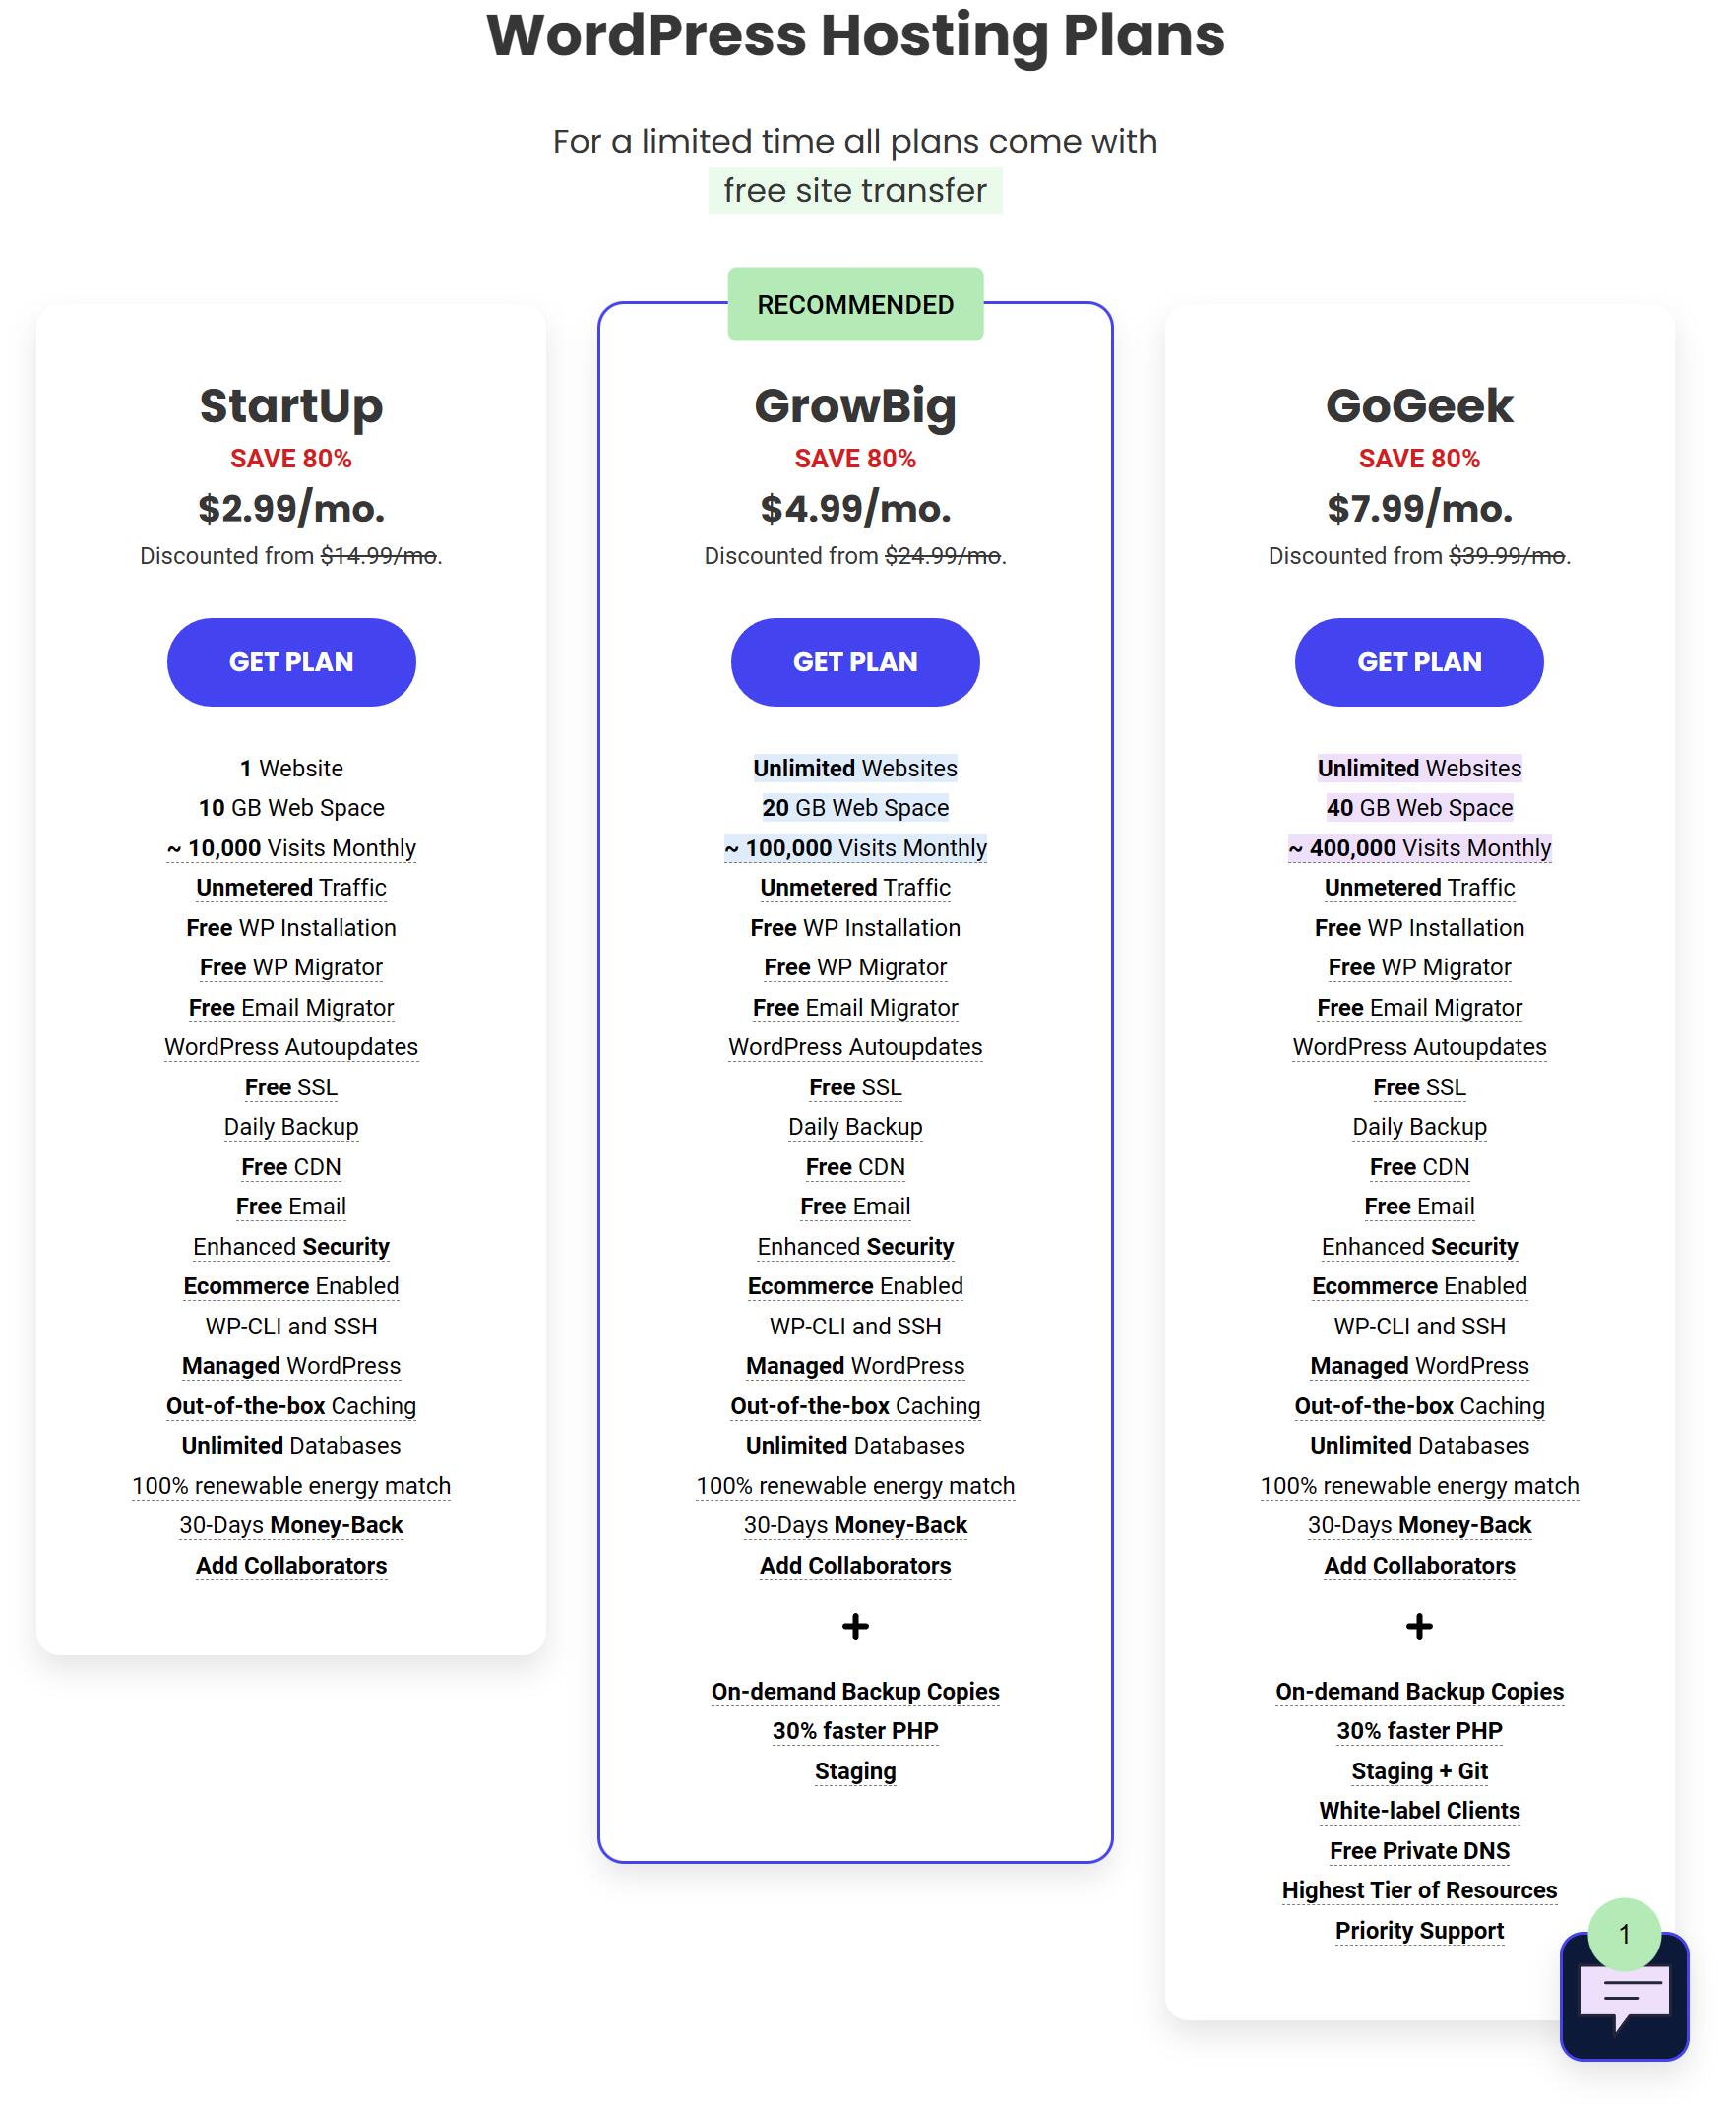
Step 1: Choose a Hosting Plan
SiteGround has three plans and everyone can sign for any of them.
- The StartUp plan is perfect for people with one website that is starting now.
- The GrowBig plan is a great value-for-money offer, including the option for multiple websites and the Ultrafast PHP that greatly improves website speed.
- The GoGeek plan is perfect for people with e-commerce and larger sites, or more geeky development needs like more server resources and GIT integration.
Step 2: Choose a Domain Name
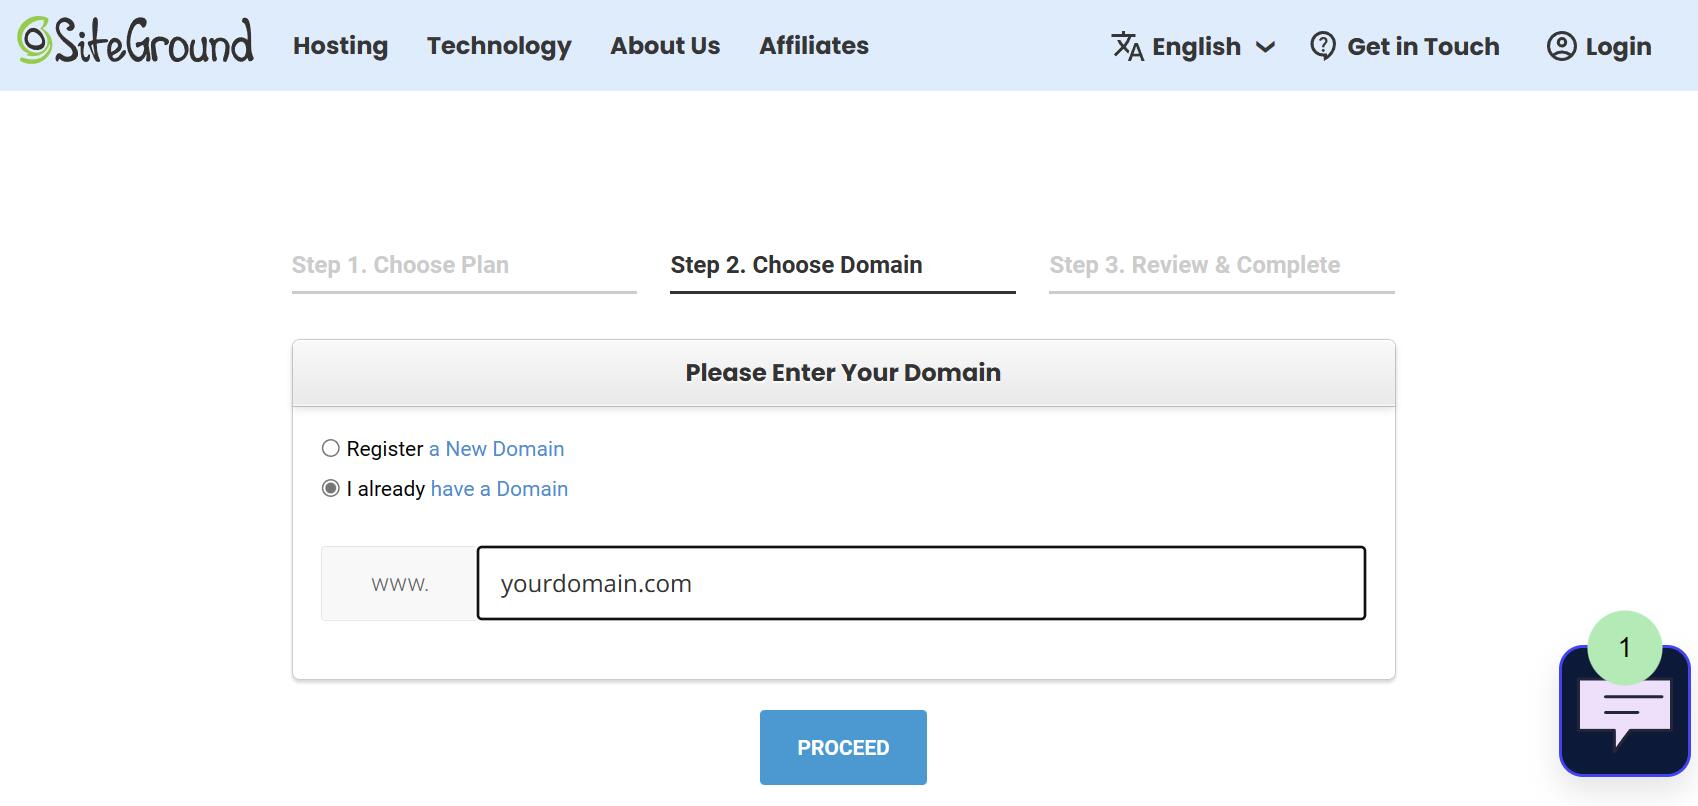
You can input the domain that you have registered. Some web hosting also provides domain registrar service, but we recommend you register the domain from a third party. The domain is your brand and your invisible assets. Just remember do not put all the eggs in one basket.
Step 3: Review and Complete the Order
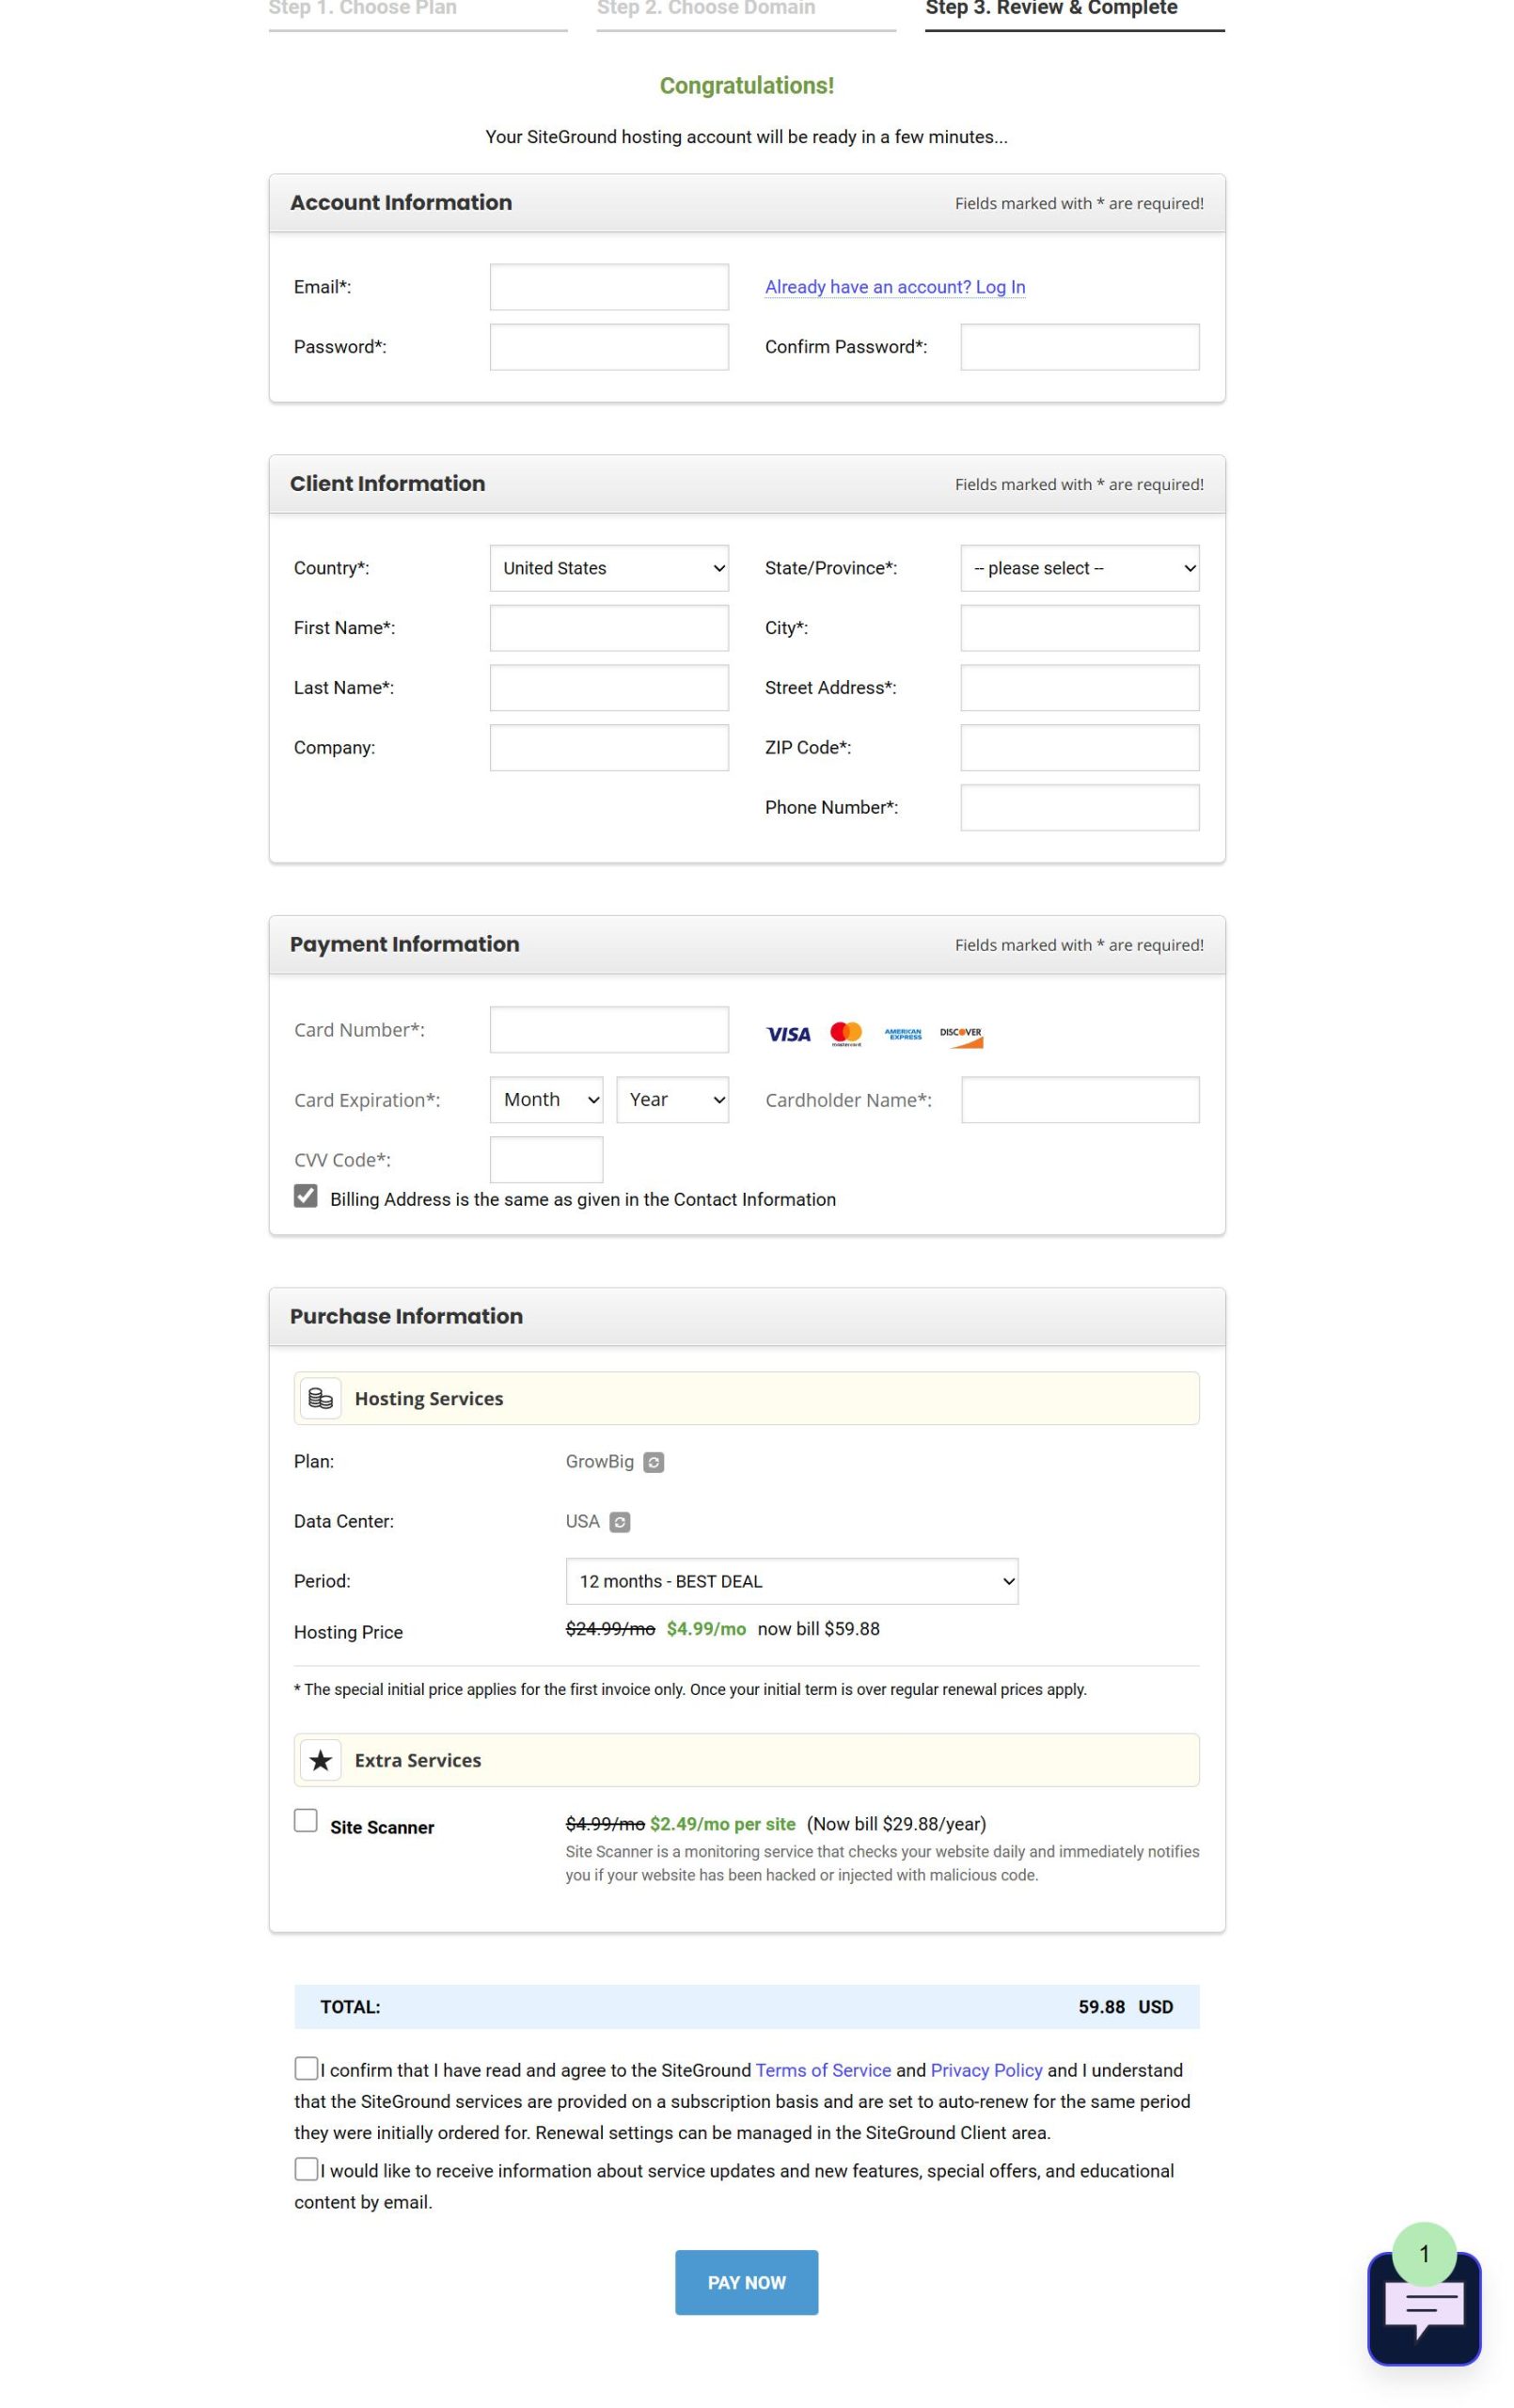
Completing the order is easy, the same as you place an order on all other e-commerce platforms. By completing the order, you will have an account in Siteground. Please save the account password to your note and log in to install your WordPress site.
3. How To Point The DNS To Web Hosting
After you complete purchasing the web hosting, you need to point your domain to Siteground. Assuming that you register your domain on Dynadot. You need to change the Dynadot name server to the siteground name server. The name server of the siteground is below.
ns1.siteground.net
ns2.siteground.net
3.1 Login to Dynadot dashboard
3.2 From the left sidebar, select Manager Domains and click on the Domain you want to edit the Name Server.

3.3: Click DNS Setting, and locate the arrow icon on the right side. Enter the Domain Setting.

3.4: After entering the domain DNS detail, Choose Name Servers from the drop-down menu of the Domain Setting.

3.5: Input the name server of Siteground, you can copy it from above and save it. Now the domain is pointing to the siteground hosting.
ns1.siteground.net
ns2.siteground.net

If you want to point your domain to other web hosting, you can also input other Name servers from other web hosting companies.
4. Run the one-click installation in your web hosting dashboard.
SiteGround’s simplified 3-step installation process will install WordPress with a theme and the most common plugins in under 2 minutes, with almost no effort from your side. The custom-developed WordPress Starter plugin is available to all clients and is designed to help people take their first steps in the WordPress world like pros.
Step 1: One-Click Easy WordPress Installation
First, you’ll need to install the application for building your website, in our case – WordPress. When you log in for the first time in your Client Area, you’ll see a welcome message and a button “SET UP WEBSITE” which will take you directly to the installation process.
On the next step, select Start New Website and WordPress as your application of choice.
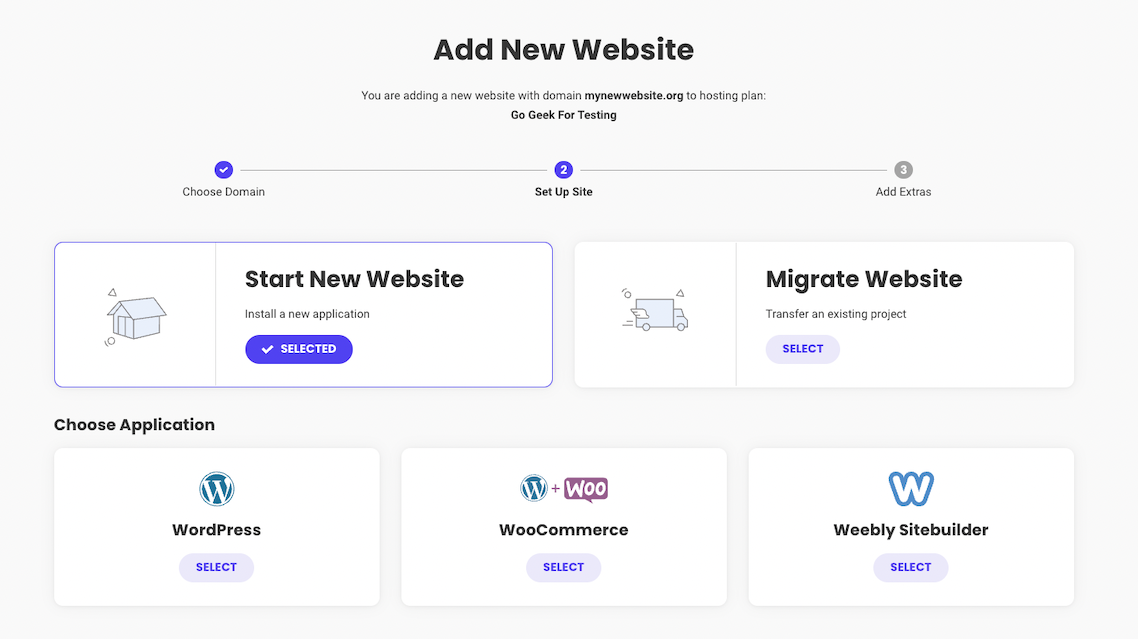
Finish the installation process by choosing whether to add extra services, such as SG Site Scanner, which scans your website every day and alerts you immediately if your website has been hacked or compromised with malicious code.
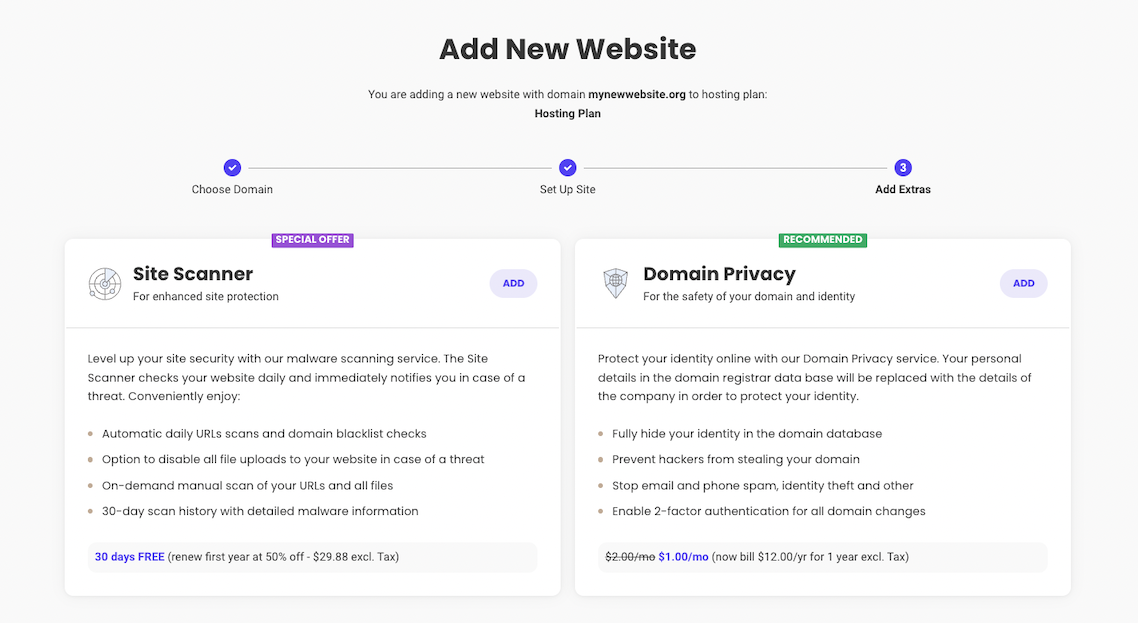
At the end, click on Finish and wait while WordPress is being installed.
Step 2: Choose A Theme
Once the WordPress installation has finished you will be prompted to the WordPress Starter wizard. Simply click on Start Now. You can choose a theme from a wide selection of free SiteGround-curated, modern and professionally designed themes.

Note that the theme will come with pre-filled sample content, enabled by the intuitive drag-and-drop page editor that SiteGround provides by default. This will help you easily visualize how the actual content would look like before you substitute it with your own website copy.
Step 3: Add Necessary Plugins To Expand Functionalities
Once you get the right design for your site, on the next step you can add some useful plugins such as:
- Contact Form – so your website visitors have an easy way to contact you;
- WooCommerce – transform your site into an online store;
- Google Analytics plugin – to help you monitor your website traffic;
- Grow Subscribers list – a plugin that will help you to capture your visitor’s emails;
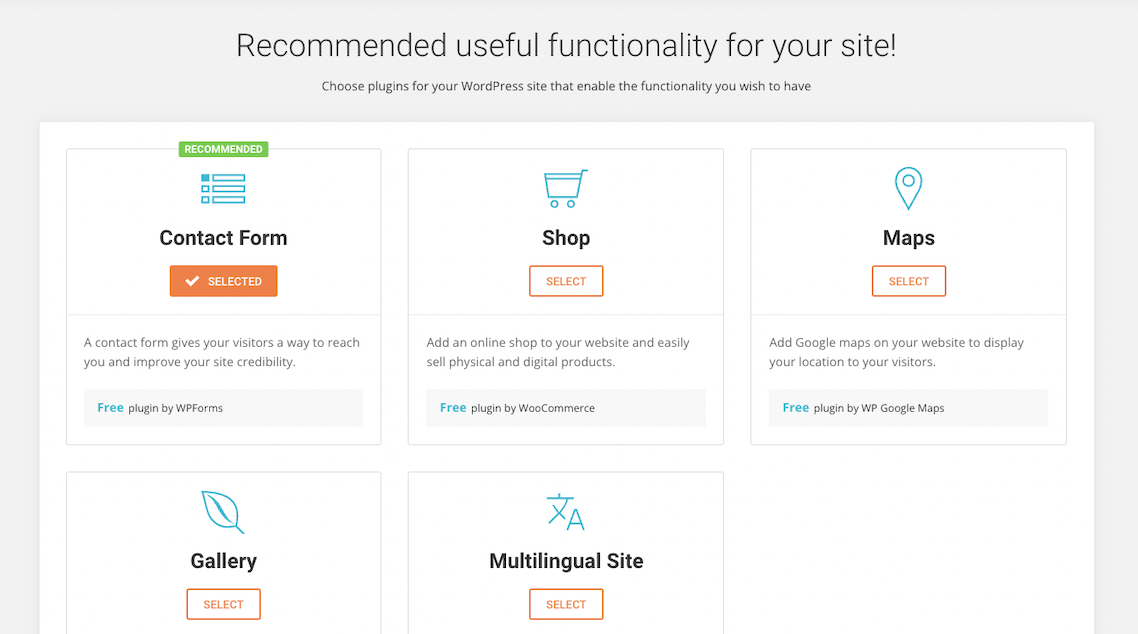
When you’ve made your choice, click Complete. In minutes, your new website will be ready with the content and functionalities you have added. Just log in to your site from http://yourdomain.com/wp-admin and start adding content using the custom WordPress dashboard.
5. Configure your WordPress site
Now that the WordPress website has been set up, you need to configure the website. The newly-created WordPress site is still a draft site with rough functionalities.
5.1 locate to setting from the left side admin menu.

5.2 Customize the site title and tagline.
The site title will appear in the logo section if you don’t use an image logo. The tagline tells your customers about your business shortly, tagline benefits the search engine optimization too. You can change it anytime you like.

5.3. Change the setting of discussion options of comments settings.
It will help you to prevent spam comments from spam bots. Cancel the ticks of default post settings. Choose the options of other comment settings, require the visitor to register before he can leave any comments, and ask for his full name and email. These will prevent auto-spam comments.

6. Customize the theme according to your requirements.
If you choose to use your own theme other than the template theme provided by SiteGround, you need to customize the theme to fit your business.
Some premium themes include great layout designs and other features that you can customize in the theme setting.
Besides that, you can also use page builders to fully customize your website. Below is 5 popular WordPress page builders you can choose from to customize your WordPress website.

