How To Display Item Sold Number On Your Single Product Page For WooCommerce Store

Displaying the sold number of your product on the WooCommerce Store product page is crucial to your online business. It helps you to gain more customer trust. People feel more confident and secure when they see others shopping in your store. Therefore, displaying the product sold number can improve the conversion rate for your online business.

Unfortunately, most themes do not have such features to display the product sold numbers on the single product page, including the WooCommerce storefront theme.

In this article, we will introduce how to display the product sold number on a single product page.

Many paid plugins can do that, but we are introducing how to create your own plugins to display the product sold number on a single product page. We will use the WooCommerce Storefront Theme as example.

Step-by-Step Guide to Create the Plugin To Display Product Sold Number

Step 1: Create the Plugin File

First, we need to create a new plugin file

  1. Create a new folder named sold-items-display.in your local PC
  2. Inside that folder, create a file named sold-items-display.php.

In the sold-items-display.php file, we will add the necessary code for the plugin.

Step 2: Add the Plugin Header

The plugin requires a header section to define its name, version, author, and description. Add the following code at the top of the file:

				
					<?php
/*
Plugin Name: Sold Items Display for WooCommerce
Description: Displays the number of items sold on the single product page and allows manual control of the sold number from the Product Data Inventory tab.
Version: 1.2
Author: WPCOLLEGE
Author URI: https://wpcollege.com
*/


This defines the plugin and will allow you to activate it from the WordPress admin panel.

Step 3: Add a Custom Field to Control Sold Items

Next, we will add a custom field to the WooCommerce product data panel where store owners can manually set the number of items sold.

				
					// Add Custom Sold Items Field to the Inventory Tab
function add_sold_items_field_to_inventory() {
    woocommerce_wp_text_input( array(
        'id'                => '_custom_sold_number',    // Custom meta key for the field
        'label'             => __('Sold Items Override', 'woocommerce'),  // Field label
        'desc_tip'          => true,
        'description'       => __('Manually set the number of items sold for this product.', 'woocommerce'),
        'type'              => 'number',
        'custom_attributes' => array(
            'step' => '1',
            'min'  => '0'
        ),
    ));
}
add_action('woocommerce_product_options_inventory_product_data', 'add_sold_items_field_to_inventory');


This code creates a custom input field in the Inventory tab of the WooCommerce product editor where you can manually set the number of sold units for each product.

Step 4: Save the Custom Sold Items Value

To ensure that the custom field value is saved when the product is updated, use the following code:

				
					// Save the Custom Sold Items Field
function save_custom_sold_items_field($post_id) {
    $custom_sold_number = isset($_POST['_custom_sold_number']) ? sanitize_text_field($_POST['_custom_sold_number']) : '';
    update_post_meta($post_id, '_custom_sold_number', $custom_sold_number);
}
add_action('woocommerce_process_product_meta', 'save_custom_sold_items_field');


This function saves the custom “sold items” value to the product’s metadata in the database.

Step 5: Display the Sold Items on the Single Product Page

Next, we need to display the number of sold units on the product page. This will be shown below the “Add to Cart” button.

				
					// Display the Sold Items Under Add to Cart Button
function show_custom_sold_items_count() {
    global $product;

    // Get the custom sold number from post meta
    $custom_sold_number = get_post_meta($product->get_id(), '_custom_sold_number', true);

    // Use custom sold number or fallback to WooCommerce default sales count
    $sold_items = ($custom_sold_number !== '') ? intval($custom_sold_number) : get_post_meta($product->get_id(), 'total_sales', true);

    if ($sold_items > 0) {
        // Display "Units Sold" in black, and "20 sold" in red, bold
        echo '<p class="sold-items-count">Units Sold: <span class="sold-number">' . $sold_items . ' sold</span></p>';
    } else {
        echo '<p class="sold-items-count">No items sold yet</p>';
    }
}
add_action('woocommerce_after_add_to_cart_button', 'show_custom_sold_items_count');


This code retrieves the sold number, either from the custom field (if set) or the default WooCommerce sales count. It then displays it under the “Add to Cart” button on the single product page.

Step 6: Style the Sold Items Display

You can also add some basic styling to differentiate the “Units Sold” and “sold” text. Here’s the CSS that you can inject into the header of your WooCommerce site:

				
					// Add Custom Styling for Sold Items Display
function sold_items_count_css() {
    echo '
    <style>
        .sold-items-count {
            font-size: 16px;
            color: black;
            font-weight: 400;
            margin-top: 10px;
        }
        .sold-items-count .sold-number {
            color: red;
            font-weight: bold;
        }
    </style>';
}
add_action('wp_head', 'sold_items_count_css');


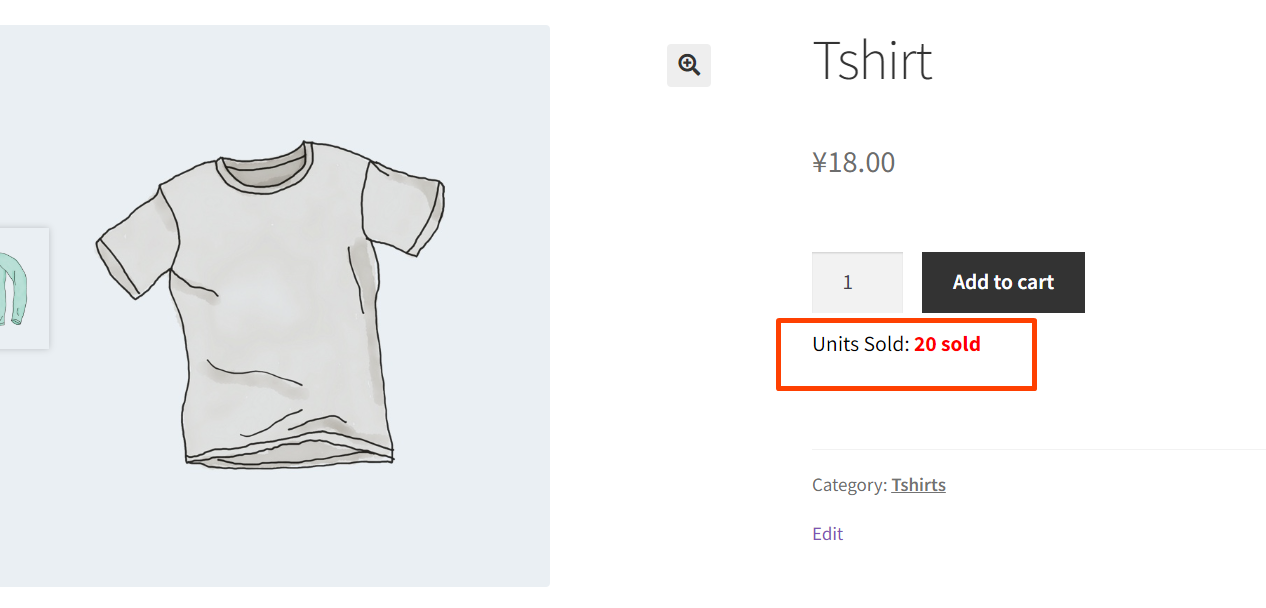
This code ensures that “Units Sold” appears in black with normal font-weight while the actual number sold (e.g., “20 sold”) appears in red and bold.

Step 7: Install and Activate the Plugin

Now that your plugin is complete, follow these steps to install and activate it:

  1. Zip the sold-items-display folder.
  2. Go to your WordPress dashboard.
  3. Navigate to Plugins > Add New.
  4. Click the Upload Plugin button.
  5. Choose the zip file you created and click Install Now.
  6. Once installed, click Activate.
After the plugin Activate, choose any product you want to edit.
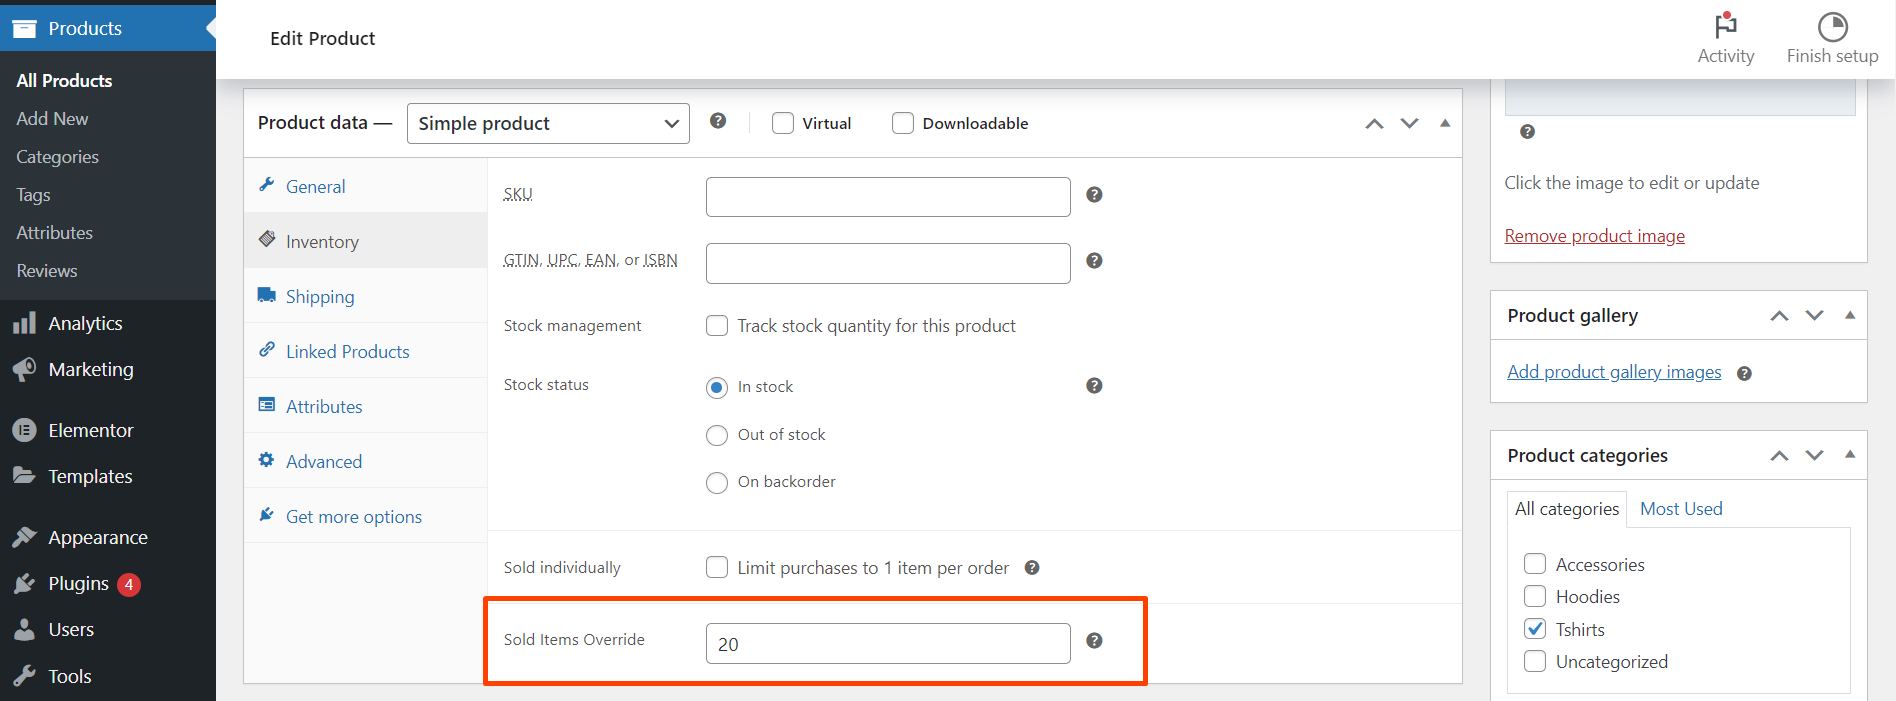
navigate to Edit Product -> Inventory
You can input the product sold number and update it. After that, check the single product pag,the product sold number will display under the Add To Cart button,here is what it looks like.
 
Scroll to Top