When you create a WordPress plugin,sometimes you need to add an admin menu to WordPress dashboard.An admin menu makes your plugin easier to access. Also with a custom admin menu, you can show and add more features to your WordPress site.
In this article, we will introduce how to add an admin menu item to the WordPress dashboard.
Step 1, Create an empty WordPress plugin. You can refer to this article How to create your first WordPress plugin
Step 2, Use a WordPress function to create and control the admin menu. You can use WordPress hook add_action() and add_menu_page() to add an admin menu to your WordPress admin dashboard.
add_action($tag, $function_to_add, $priority, $accepted_args)
add_menu_page($page_title, $menu_title, $capability, $menu_slug, $function, $icon_url, $position)
The snippets is as below
<?php
/**
 * Plugin Name: Your_Plugin
 * Plugin URI:  https://yourwebsite.com
 * Description: Your first wordpress plugin
 * Version:     1.0
 * Author:      WordPress Contributors
 * Author URI:  https://yourwebsite.com
 * Text Domain: your first wordpress plugin
 * Domain Path: /languages

*/

add_action('admin_menu', 'your_first_plugin');


function your_first_plugin(){
    add_menu_page('Yourfirstplugin', 'Your_first_plugin', 'manage_options', 'first_plugin', 'Your_Plugin_text');

}

function Your_Plugin_text(){?>
    <div class="wrap">
    <h1>your first plugin</h1>

    </div>
<?php
}
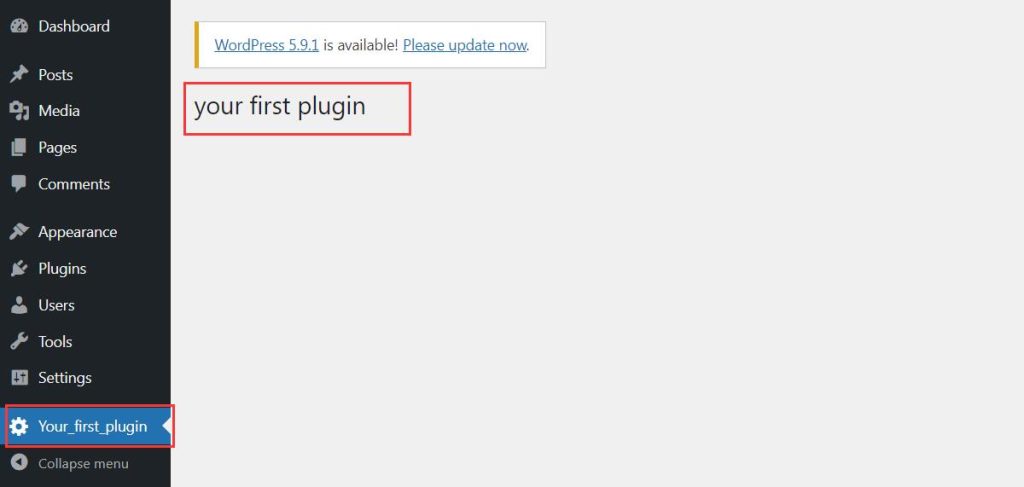
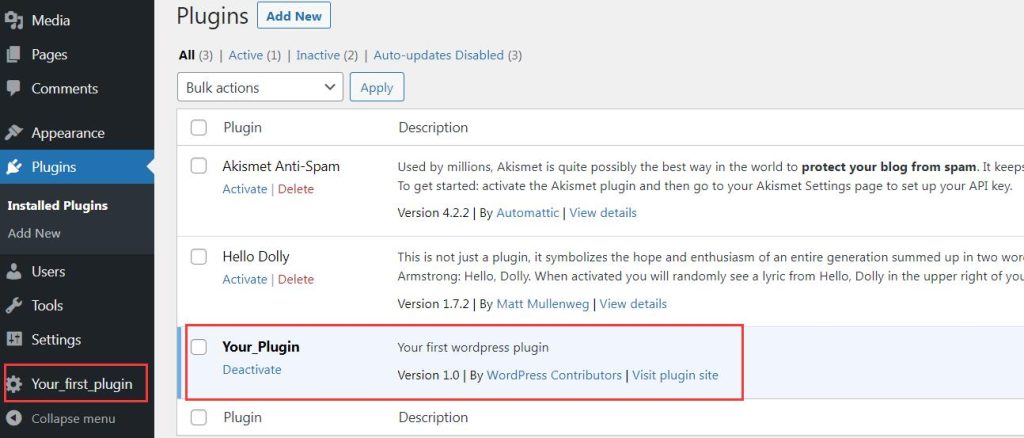
Step 3, Save the snippets as a php document and upload it to wp-content/plugins. After activating it, you will see that a new admin menu appears in your WordPress admin dashboard.
However, when you enter the plugin by clicking the menu item, you will only see a title in this plugin, because it’s an empty plugin now. You can add your HTML code inside the last function to implement more features to your plugin.