
Although creating a child theme in your WordPress site is not a necessary option to start your WordPress site, it has several benefits to have a child theme in your WordPress site.
Preserves parent theme updates
When you create a child theme, any modifications you make to the theme files are kept separate from the parent theme. This means that when the parent theme releases updates, such as bug fixes or new features, you can safely update the parent theme without losing your customizations.
Maintains code organization
A child theme allows you to keep your custom code separate from the parent theme’s code. This organization makes it easier to manage and maintain your modifications over time. It also makes it simpler to identify which parts of your website are customized and which are part of the parent theme.
Enhances theme customization
With a child theme, you have complete control over the appearance and functionality of your website. You can modify template files, add custom CSS styles, and even override parent theme functions using your own functions.php file. This level of customization empowers you to tailor the theme to your specific needs without limitations.
Supports code reusability
If you plan to use the same parent theme as a foundation for multiple websites, a child theme allows you to reuse your customizations across those sites. This saves time and effort since you only need to create the child theme once and can apply it to multiple instances of the parent theme.
How to create a child theme for your WordPress site?
Creating a child theme is literally easier than you thought, all you need to do is add a document to your WordPress files directory.
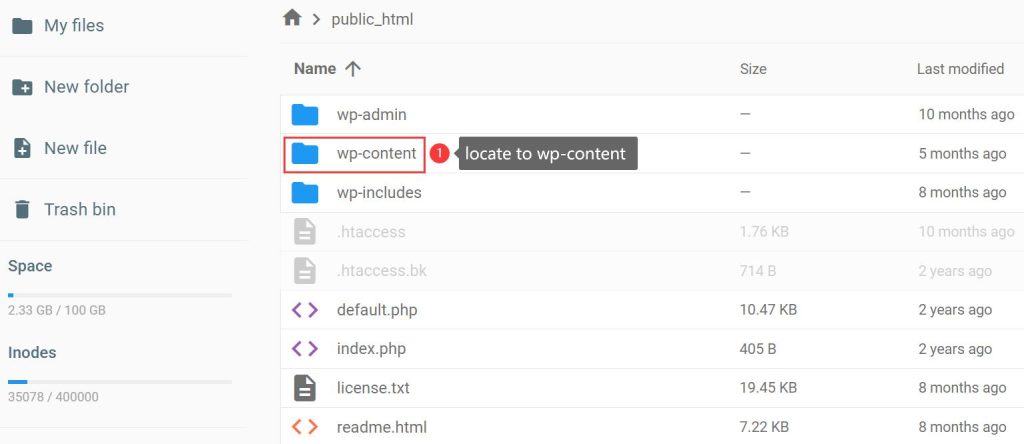
If you are using a shared hosting that provides free cPanel service, you can access the file manager to create a child theme. If you are using VPS hosting, you can use an FTP client like FileZilla or access the files through your hosting provider’s file manager. Now follow the steps below to create your first child theme for your website. Assuming you are using shared hosting from Hostinger, we use the Hpanel for example.
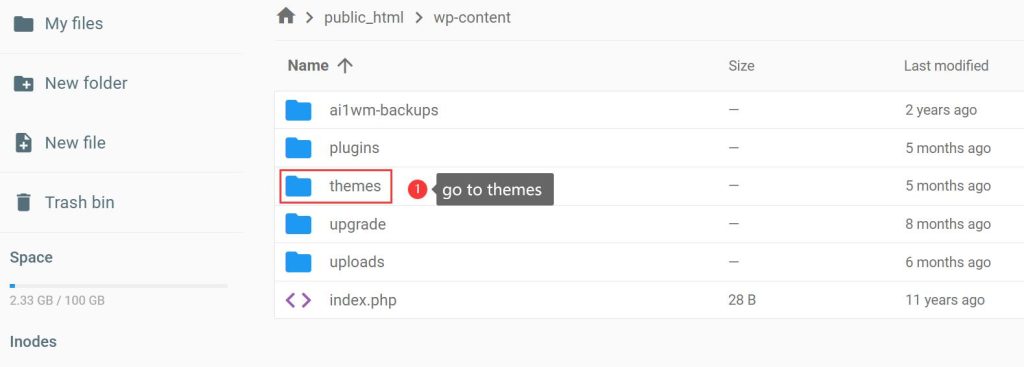
1. Locate to the “wp-content/themes” directory: This is where the theme files are located.
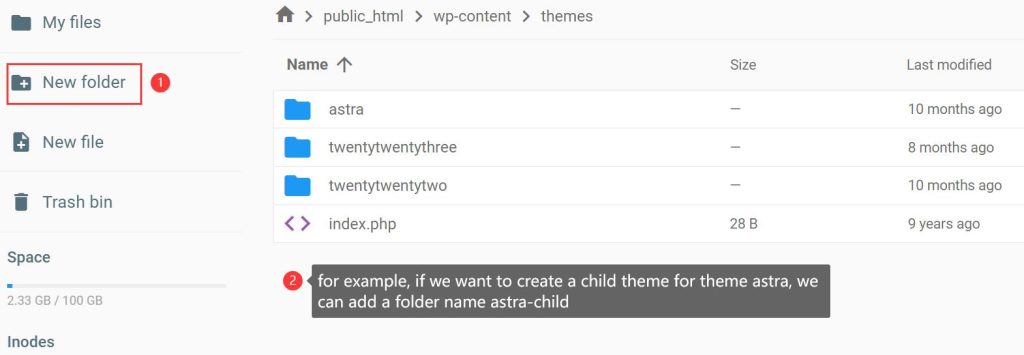
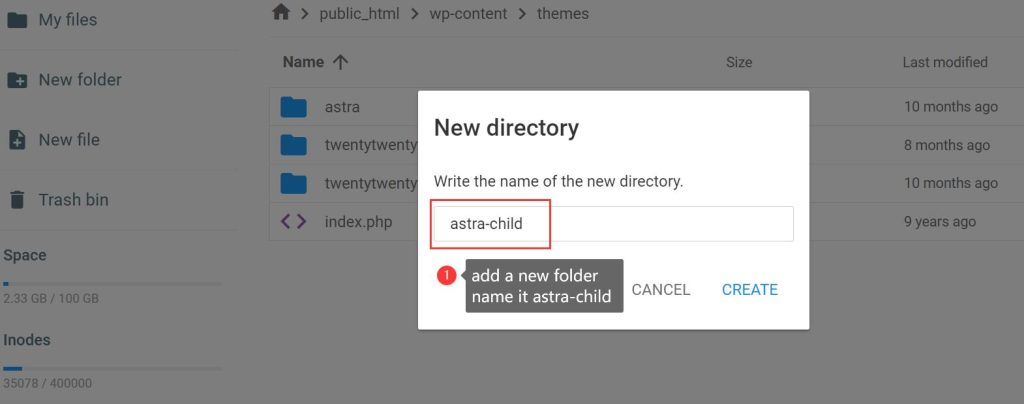
2. Create a new folder for your child theme: Inside the “themes” directory, create a new folder with a unique name for your child theme. For example, if you want to create a child theme for the “Astra” theme, you can name the folder “astra-child”.
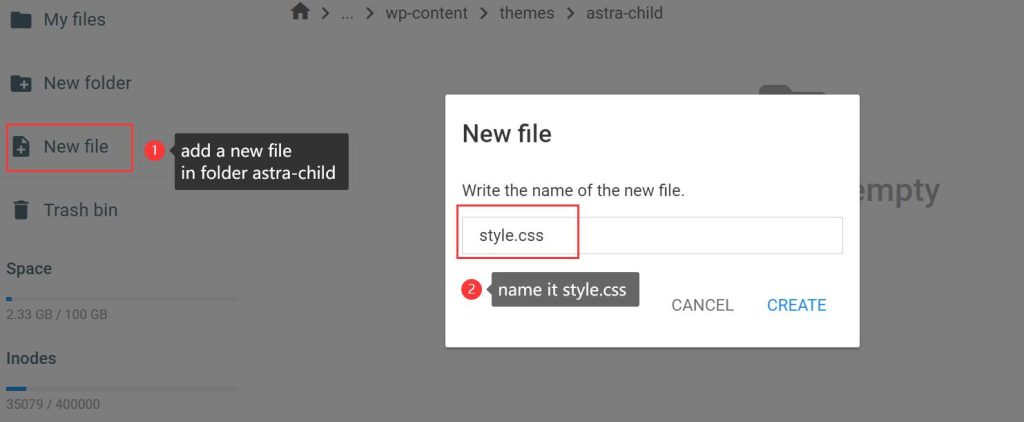
3. Create a style.css file: Inside the child theme folder, create a new file named “style.css”. This file will contain information about your child theme.
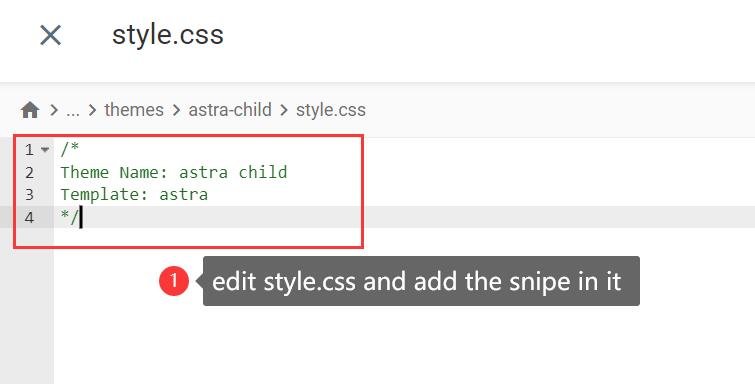
4. Open the style.css file for editing: You can use a text editor or a code editor to open the file. Add the required information to style.css: In the style.css file, you need to add the following required information:
/*
Theme Name: Your Child Theme Name
Template: parent-theme-folder-name
*/
In this case, we will add the snippet below
/*
Theme Name: astra child
Template: astra
*/
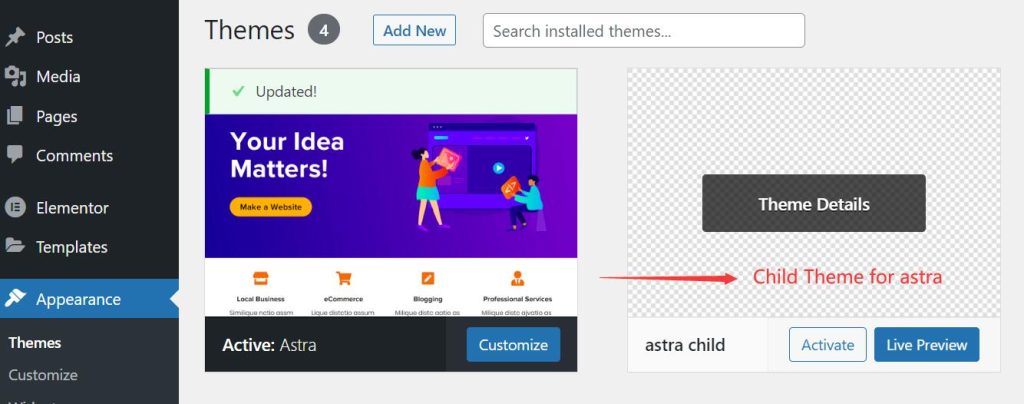
- You can also add other information like Author, Description, Version, etc., to the style.css file. Generally, after you add the style.css file to the new folder and save it. The child theme has been created successfully. You can activate the child theme in your WordPress dashboard. Go to the Dashboard-> Appearance-> Themes, you will find the newly-created child theme.
If you want to customize the child theme, you can create a functions.php file to customize it. However, this is an option but not necessary. You can add a picture to the folder of the child theme and name it as screenshot.jpg, it will show up on the cover of your child theme.
Wrapping up
The functionalities of the child theme are the same as the parent theme. So you don’t need to worry about losing some customized features in your parent theme. The child theme can make your site more secure and preserve your data when you are customing your site.


